Microsoft Office365 Email OAuth
This guide helps in authenticating an outlook email account in frappe.
- Go to your Frappe instance and create a New Connected App and save it (just enter the name and save) and copy the Redirect URI for later.


- Login to Microsoft Azure, search for and select Microsoft Entra ID (formerly called Azure Active Directory).

- Click Add -> App registration

- Enter the respective details (app name, account type), paste the previously copied redirect URI from Frappe instance and select the platform as “Web”.

To know more about the account types, click here
- Click on Register and you’ll be redirected to your created app. Copy your Application ID - it’s the Client ID you'll need to paste into your Connected App on your Frappe instance.

- Head over to API Permission section in your app and add Microsoft Graph permissions.

- Select Delegated Permissions for
IMAP.AccessAsUserAll,SMTP.Sendandoffline_access, then click "Add permissions"


- Head over to Certificates & Secrets to create a Client Secret

Add description and click on add to see a newly generated client secret.

Copy over the Value - paste this in the Client Secret field in the new Connected App on your Frappe instance.

- Click on "Endpoints" and copy "OpenID Connect metadata document". This should be pasted into the "OpenID Configuration" field of your Frappe Connected App. After that, click "Get OpenID Configuration" on the Connected App, that will populate the endpoints.


Then, add these scopes, and save the document.
https://outlook.office.com/IMAP.AccessAsUser.Allhttps://outlook.office.com/SMTP.Sendoffline_access
- Click on the “Connect to {your connected app name}” button on top right which should start the Oauth flow for Microsoft.
Make sure the email account you’re authorizing is going to be the same as the one you’re going to add in frappe.
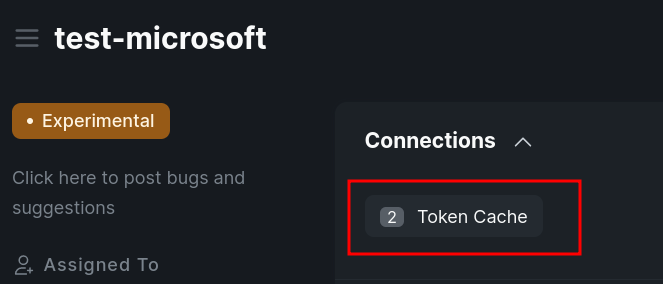
- If everything goes as planned, you’ll be redirected back to your Connected App page and should be able to see Token Cache connected to your connected app, head over to your created token cache to check if you have both refresh and access token.
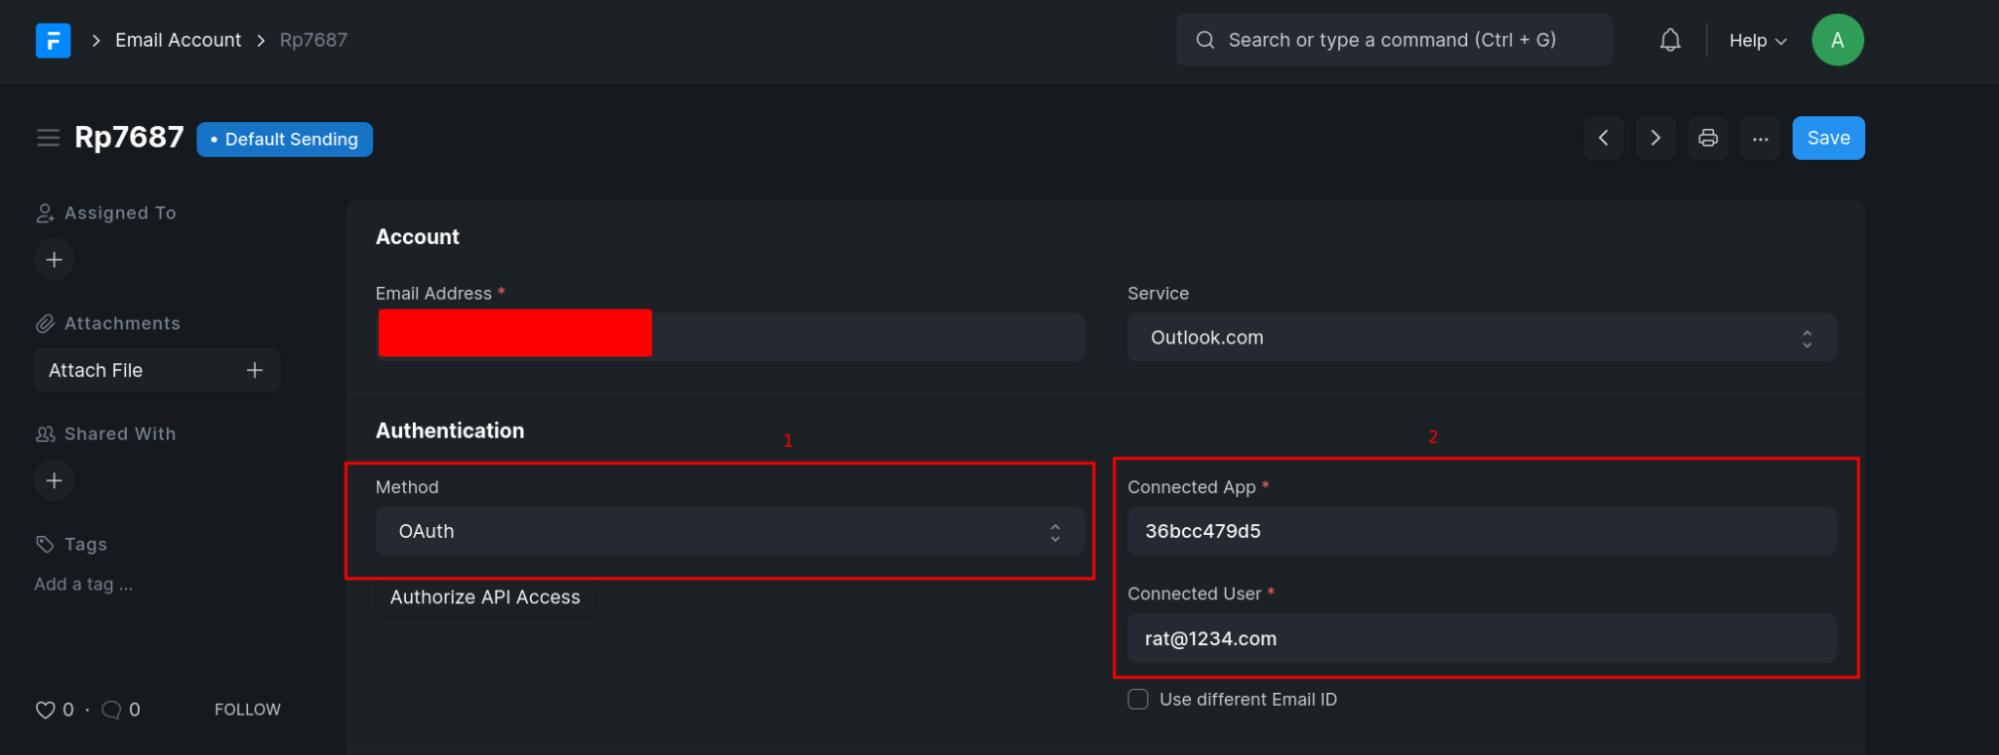
- Head over to Email Account doctype and create a new Email Account. And select the method as Oauth and add your connected app and user which has created the token cache and set up your email account as usual.
You can check the settings for outlook servers over here: https://support.microsoft.com/en-us/office/pop-imap-and-smtp-settings-8361e398-8af4-4e97-b147-6c6c4ac95353
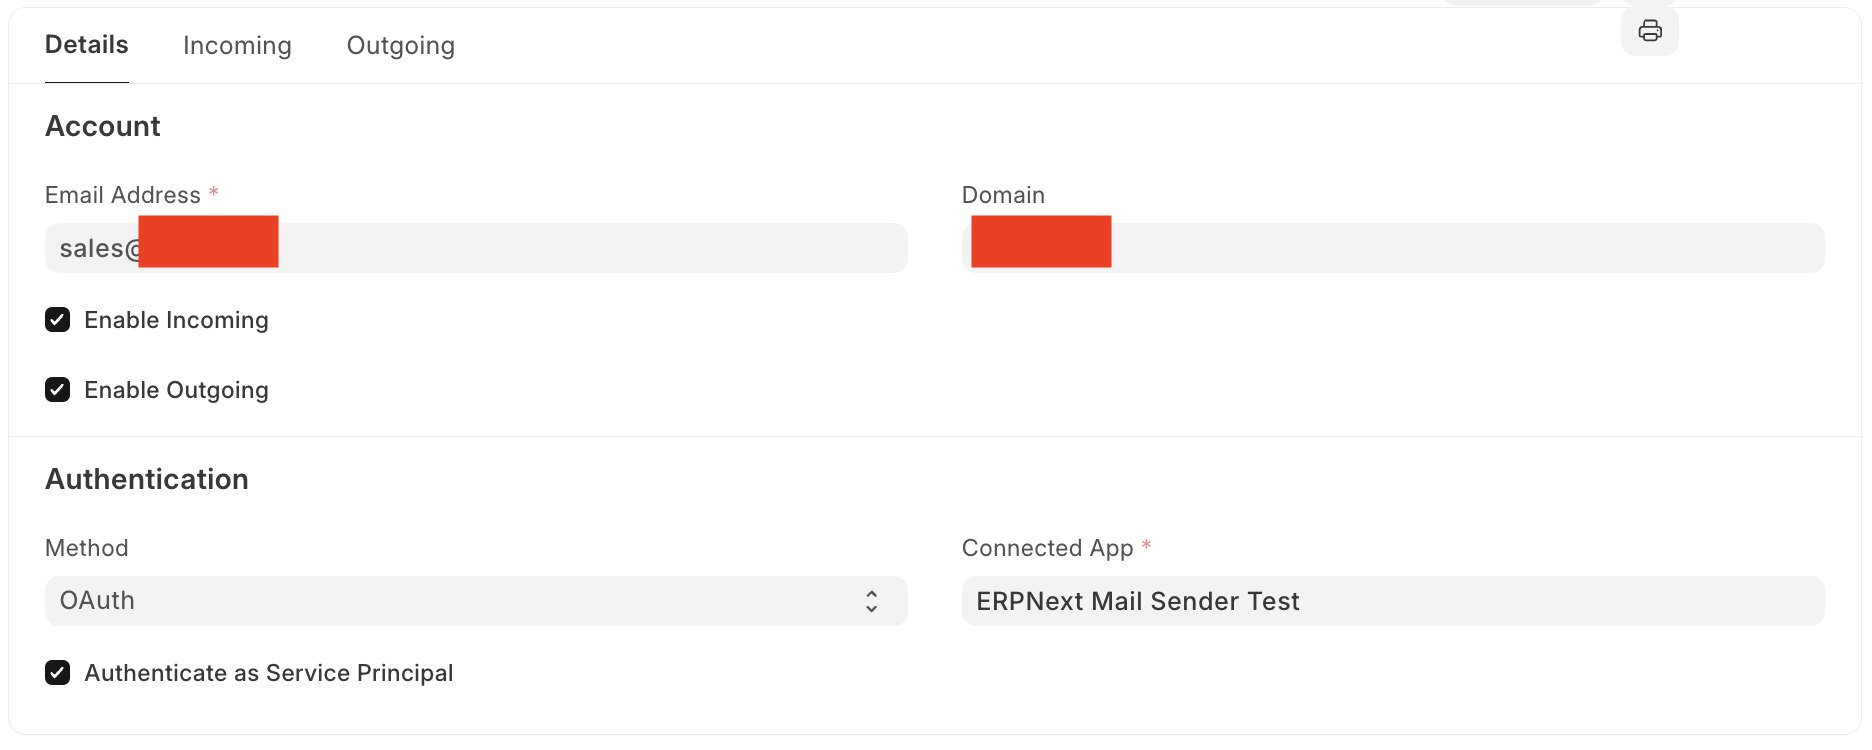
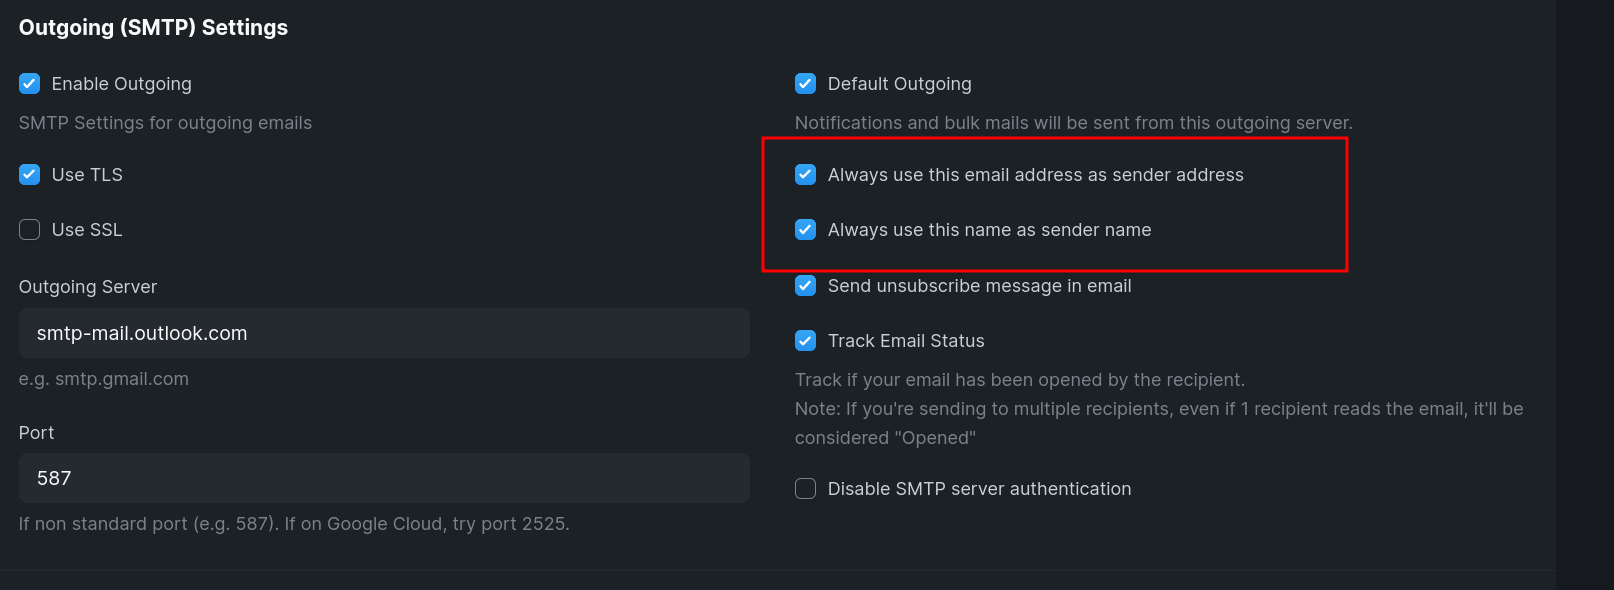
NOTE: Microsoft restricts sending from any other email address other than the one which authenticated it. For that you can check these 2 options in the email account document itself
Please visit Microsoft’s official documentation for any Additional Info: https://learn.microsoft.com/en-us/exchange/client-developer/legacy-protocols/how-to-authenticate-an-imap-pop-smtp-application-by-using-oauth
Service Principal Authentication
Email Accounts require access as a User. This disallowed the use of Shared Mailboxes dedicated to Frappe, as Full Access permissions would need to be granted to the user signing into Frappe.
This feature lets Frappe authenticate itself to e.g. Exchange Online, so it can send and receive emails from the Shared Mailbox, without having to delegate Full Access permissions to each user that accesses Frappe.
If you wish to authenticate using this method, there's a checkbox available in Email Account