Web View Pages
Web View Pages are server rendered pages for your website visitors.
We have been exclusively working with the Desk which is the admin interface accessible by System Users. Usually you will want to give limited access to your customers. In our case, we want Library Members to be able to view available Articles that they can issue from our website. Web View Pages can help us achieve that.
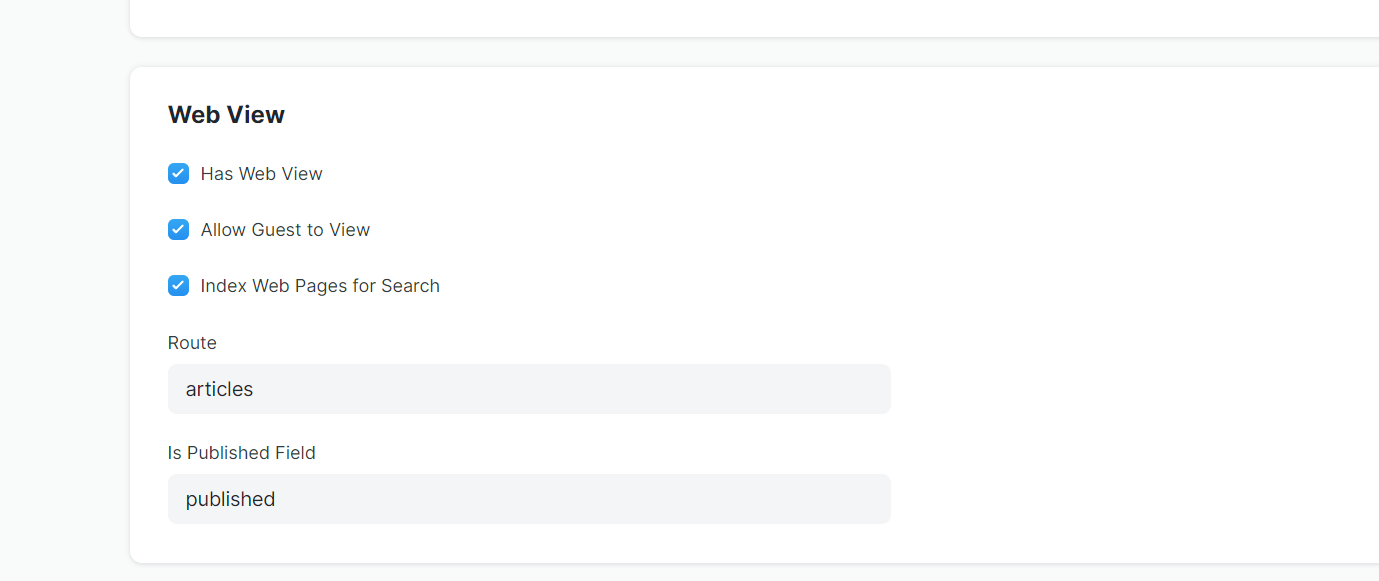
Go to Article doctype, and scroll down to the Web View section.
- Enable Has Web View and Allow Guest to View
- Enter articles in the Route field
- Add fields named Route and Published in the fields table
- Click on Save
The published field will help filter out those documents which are not supposed to be shown in web view, otherwise you will run into an error.

We have now enabled web views for Article doctype. This means you can now view details of an Article on your website without logging into Desk. Let's test this out by creating a new Article. You should see See on Website at the top left of your form. Click on it to view the web view of the Article.
Customize Web View Template
The default web view that is generated is pretty barebones and serves only as a starting point for us to customize it. When we made Article a web view, two HTML files were created namely: article.html and article_row.html
Let's edit article.html first. Frappe uses Bootstrap 4 by default for it's web views. So, you can use any valid Bootstrap 4 markup to style your pages. Add the following HTML to article.html.
{% extends "templates/web.html" %}
{% block page_content %}

{{ title }}
===========
By {{ author }}
{%- if status == 'Available' -%}
Available
{%- elif status == 'Issued' -%}
Issued
{%- endif -%}
Publisher: **{{ publisher }}**
ISBN: **{{ isbn }}**
{{ description }}
{% endblock %}
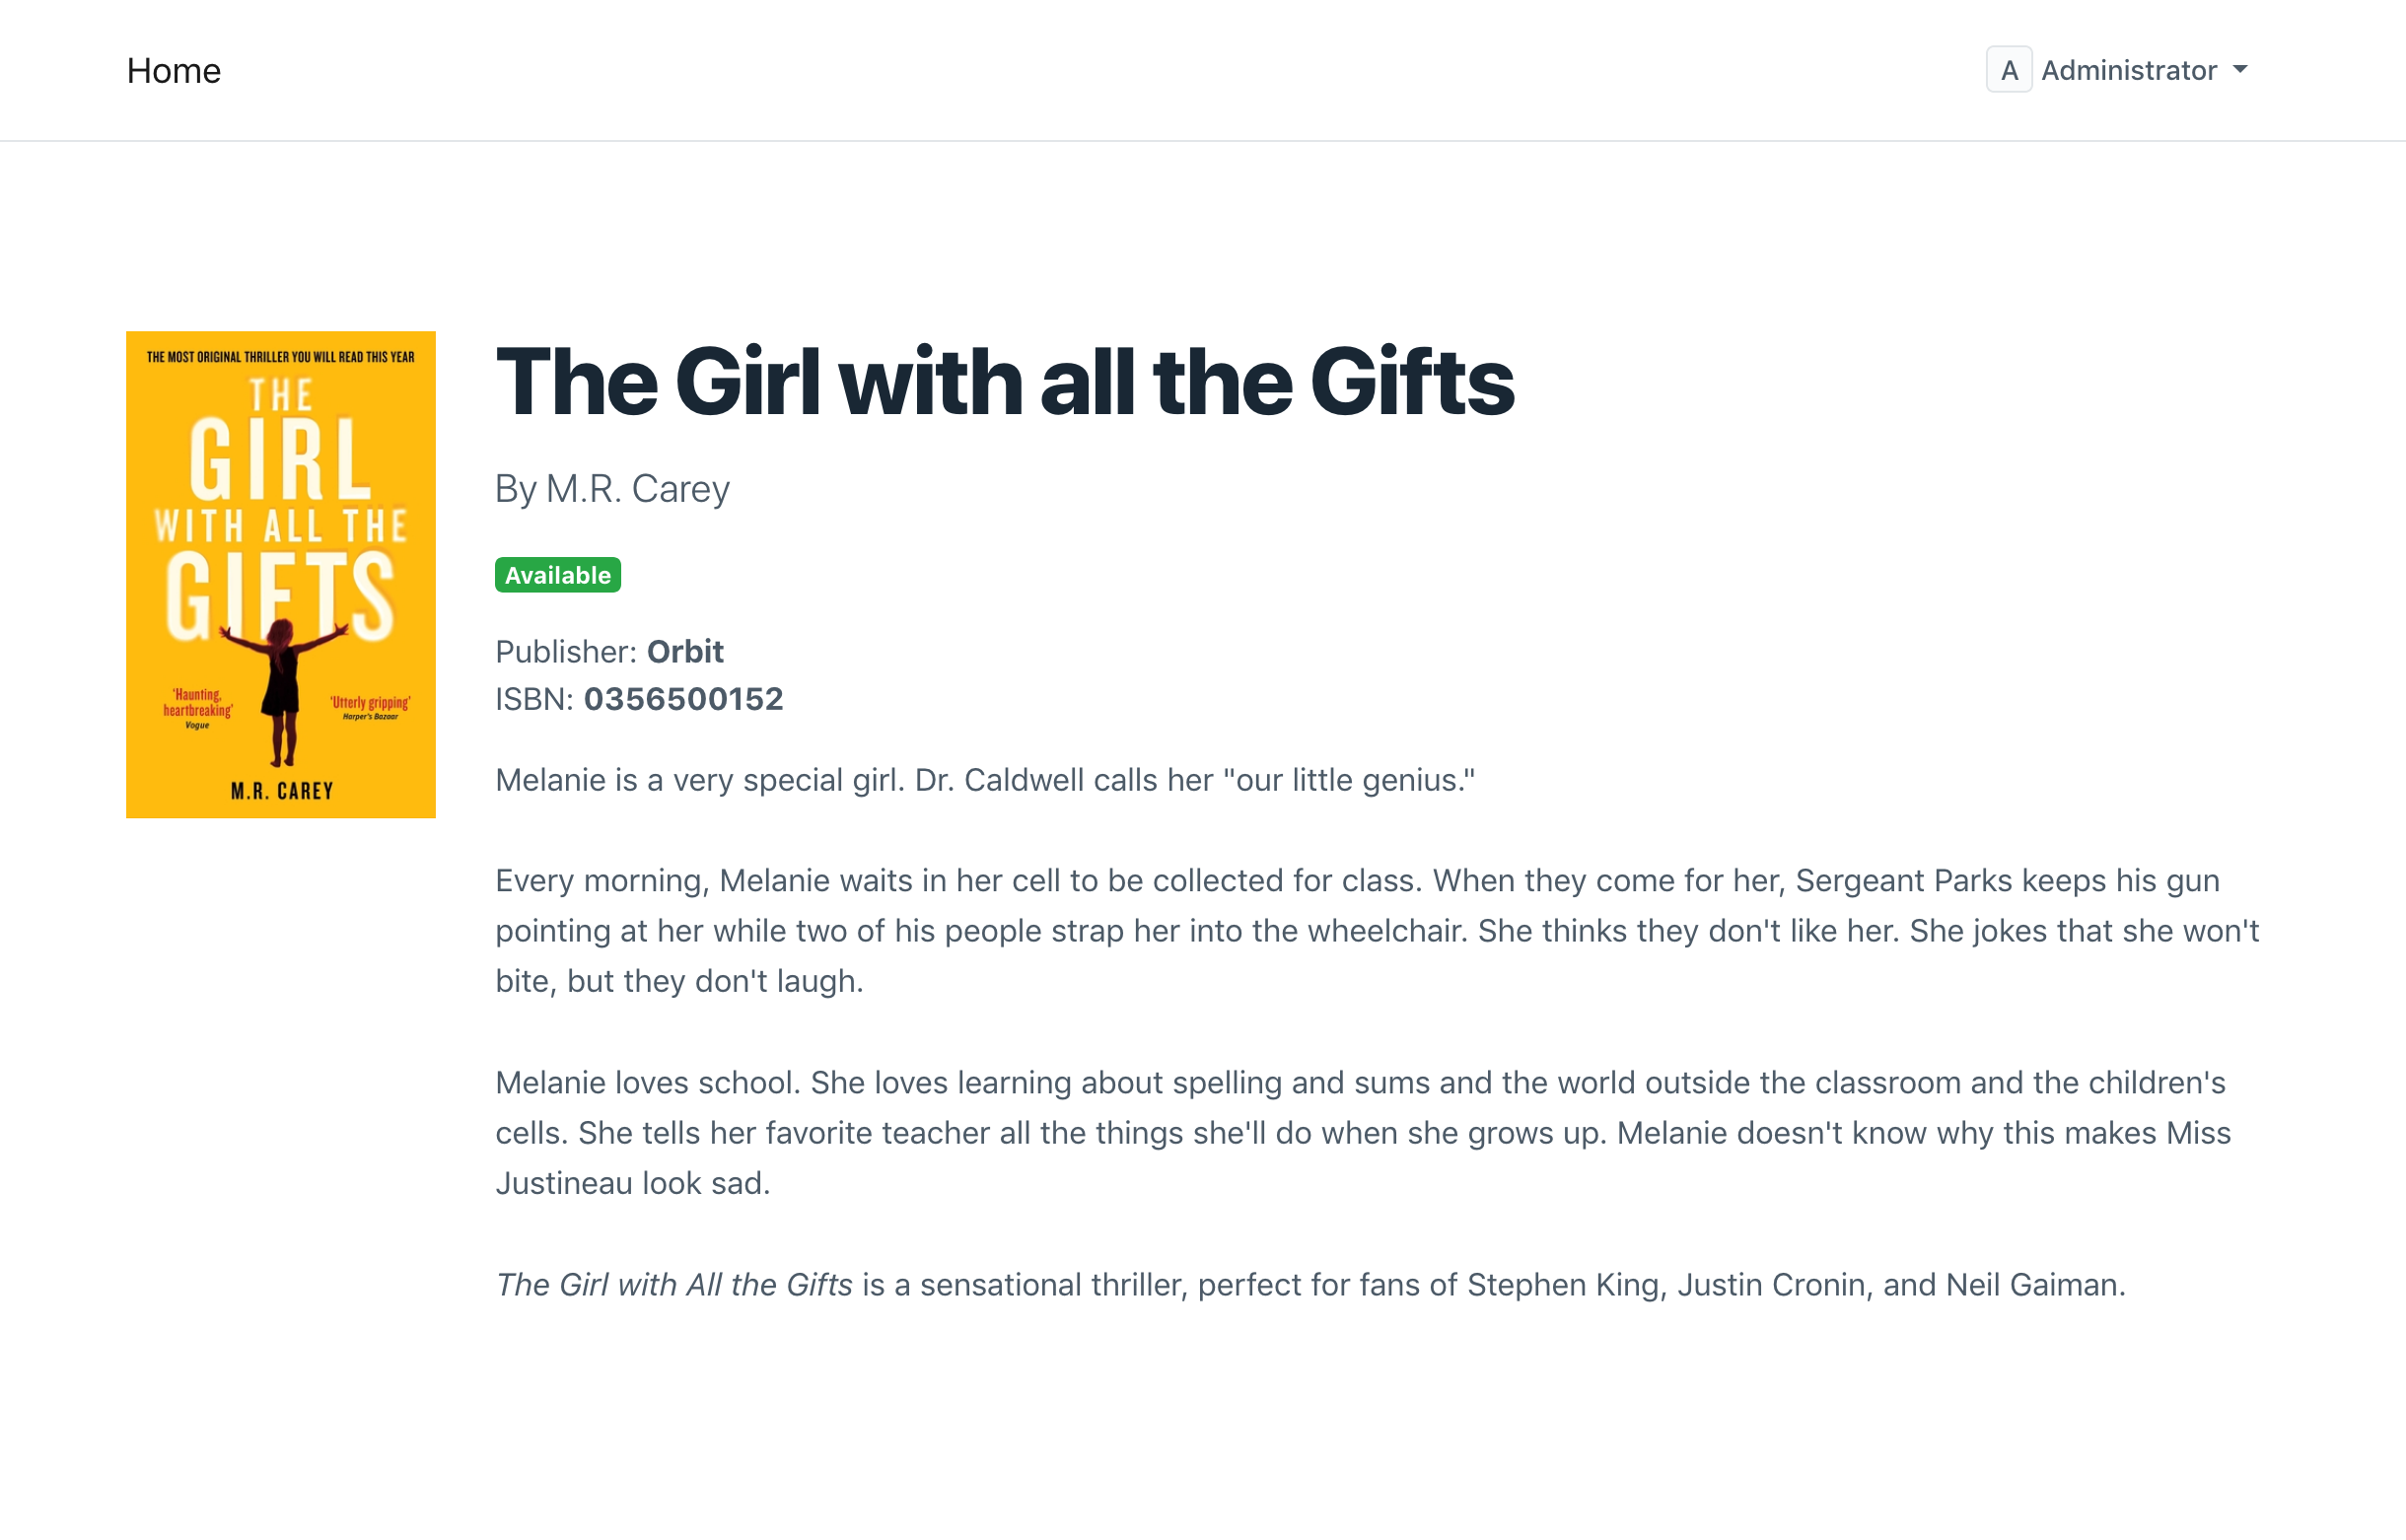
Now, go to any Article and click on See on Website. If you have filled in all fields of your Article, you should see a page like this:
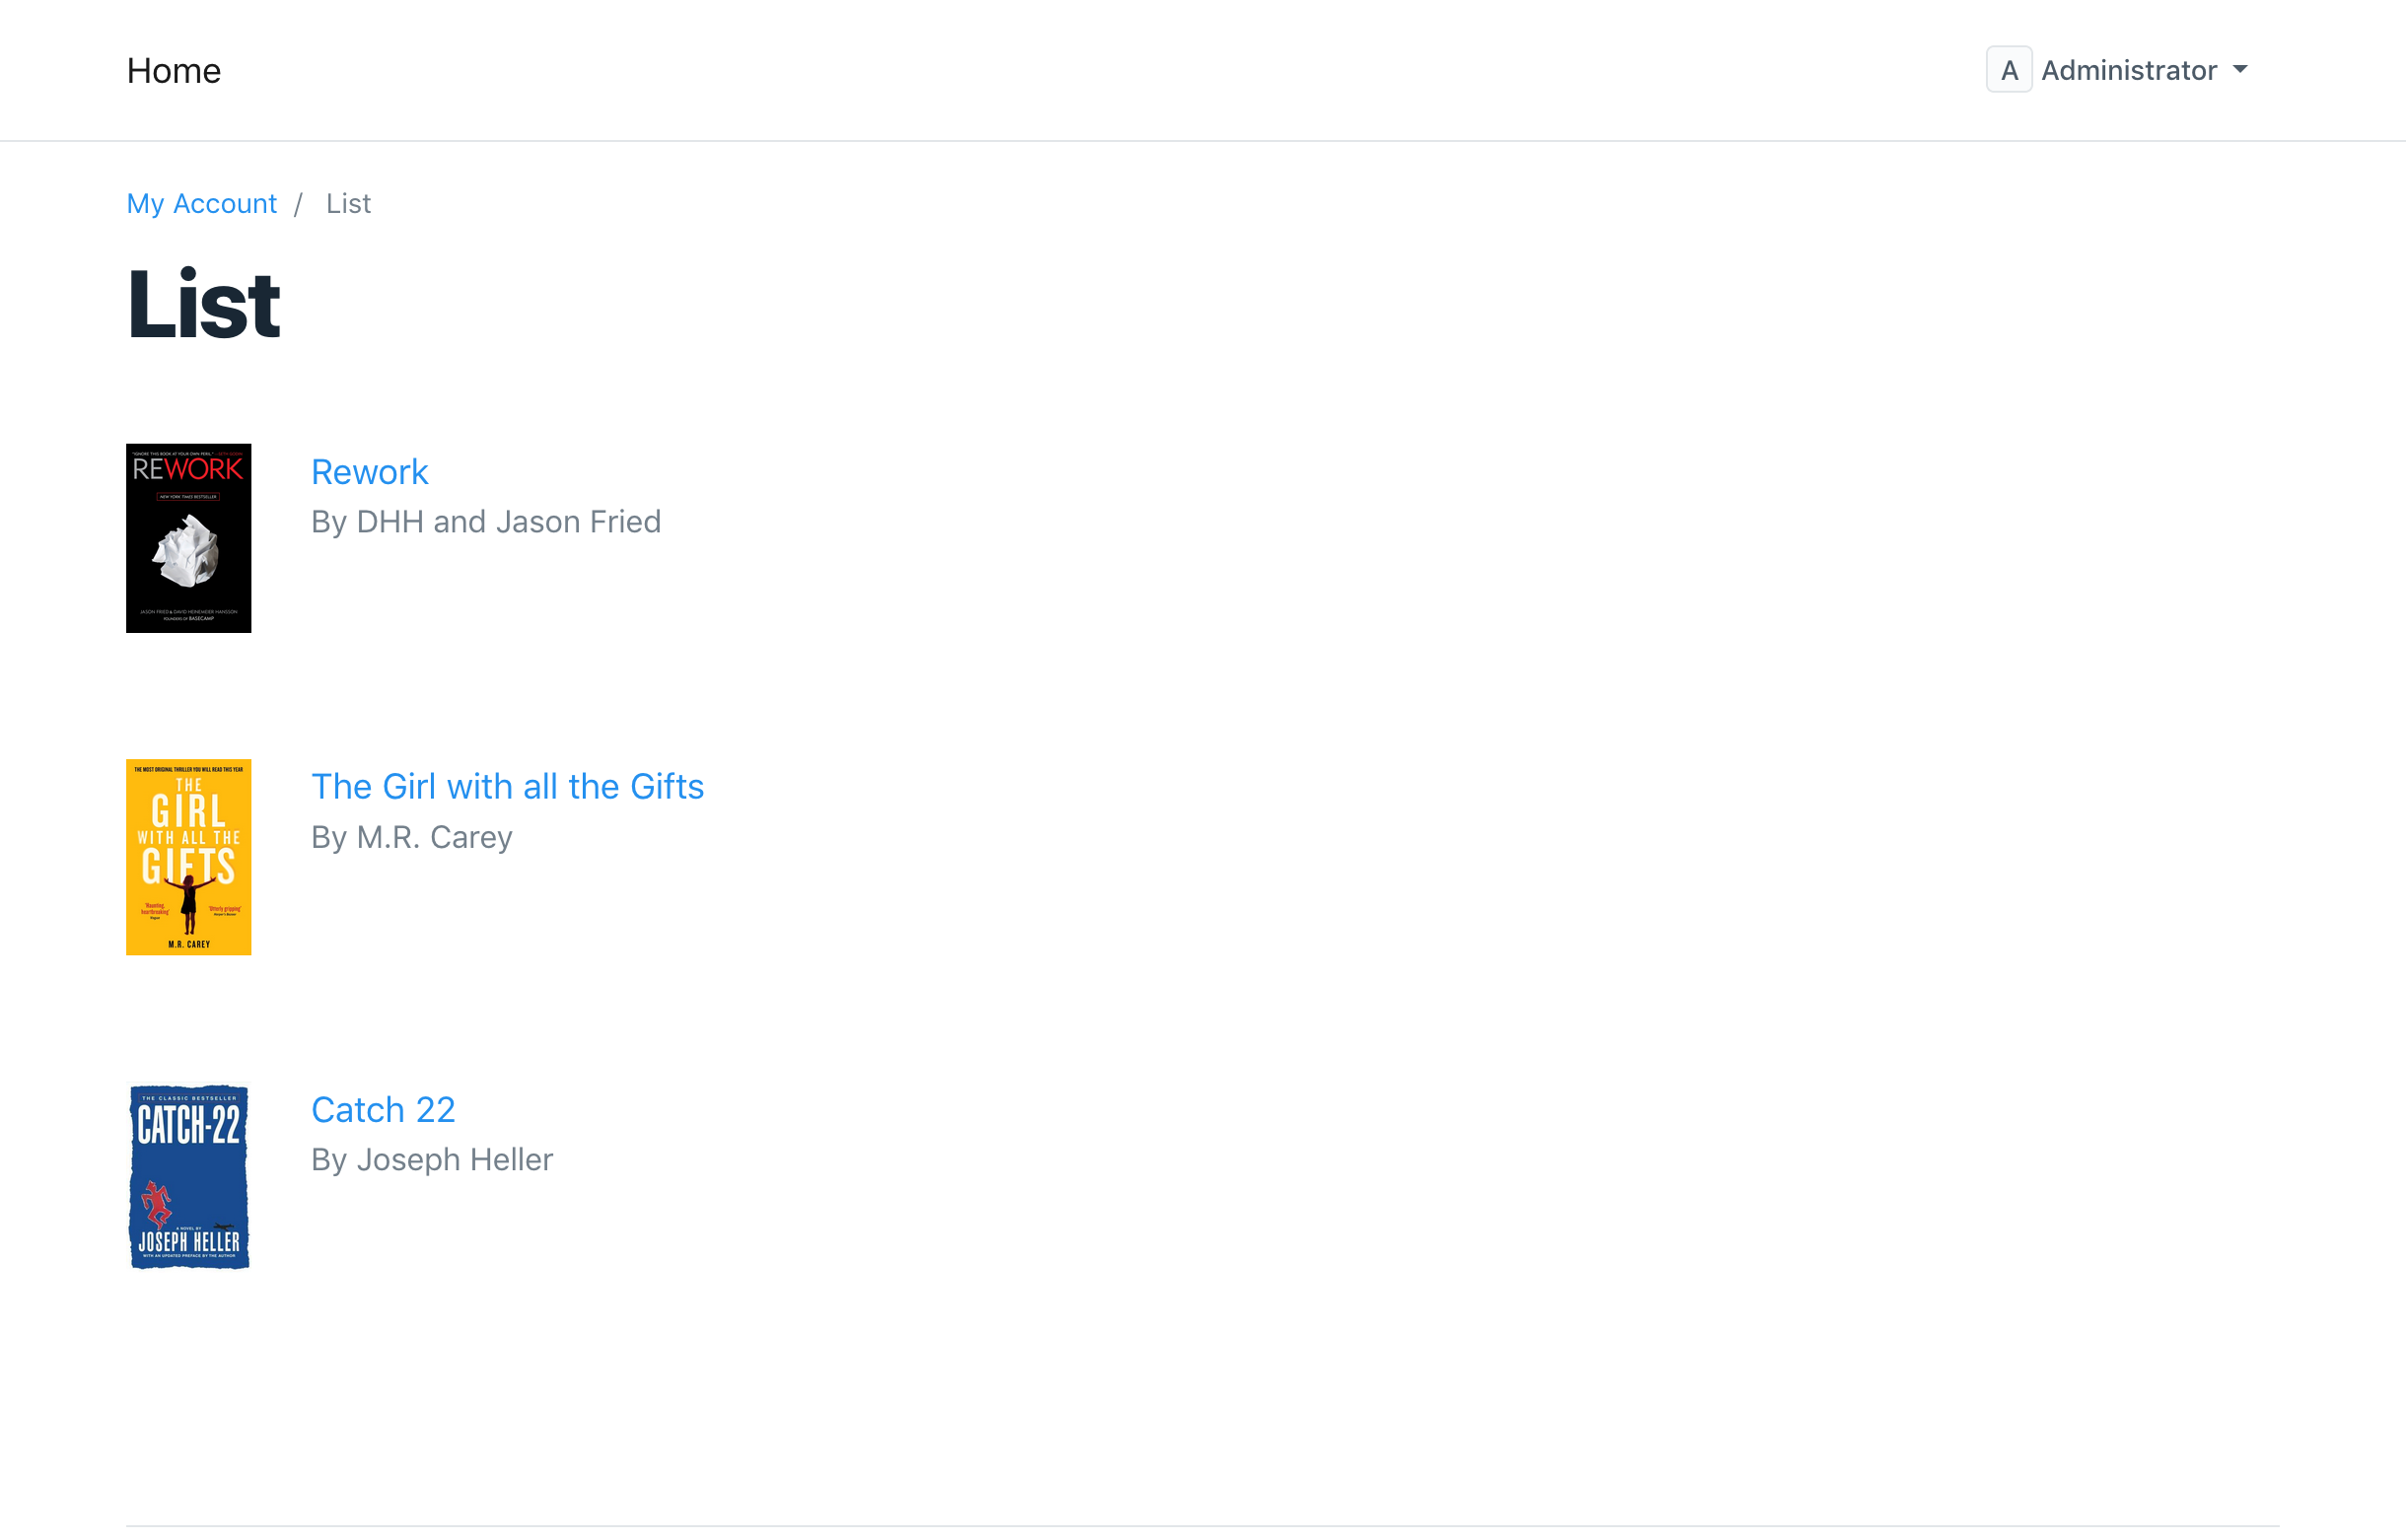
Now, open http://library.test:8000/articles. This should show the list of articles, but it is also pretty barebones. Let's customize the HTML.
Edit the article\_row.html and add the following HTML:

[{{ doc.name }}]({{ doc.route }})
By {{ doc.author }}
Now, the articles list should look prettier. You can click on any article to view it's details.
Good job on following the tutorial so far.
Next: What's Next