Using Frappe as OAuth Service
In this guide we will learn how to use Frappe Framework for authenticating 3rd party apps with OAuth. We will learn how to set up Grafana server and how to connect to the Frappe Framework for authenticating Grafana.
We hope this guide will be useful for beginners and we won’t be writing any code other than some configuration files.
Prerequisites
- A server running a debian based system(Debian, Ubuntu, Pop OS etc..)
- A Frappe Cloud account. You can sign up for Frappe Cloud here
OR * A Frappe Framework site(easier if it’s on the same server) * Basic text editing knowledge
Frappe Framework
Frappe Framework is a low-code, Python, and JavaScript web framework that is used to build delightful web applications. Frappe framework was initially developed for building enterprise-level applications, but it has evolved to be a framework for building general-purpose applications without much fuss. It’s open source and MIT licensed.
The interesting thing about Frappe Framework is that you don’t have to write code to make everything work. It was built to be as useful for anyone without prior programming knowledge. You can generate DB schemas, REST APIs, Webhooks, Reports and much more without writing a single line of code. You can check all the feature here
Grafana
Grafana is an awesome metrics visualization platform built by Grafana Labs. Grafana generates interactive graphs from data and can be used for alerting. Grafana has dashboards, which can pull data from the data source and generate graphs that make the most sense out of the data. Grafana is used internally at Frappe for visualizing server statistics for multiple clients and gives a lot of insights to the servers.
Installing Frappe Framework
Installing the Frappe Framework is an art in itself. It requires many moving parts for optimal functioning. Don't let this make you afraid; we have an elaborate guide on how to install and setup Frappe Framework in the Framework documentation.
If you want the easy way, you can install and setup Frappe Framework with Docker. You can read more about it here.
The easiest way is to use Frappe Cloud to spin up a new site with Frappe Framework installed.
Installing Grafana
For installing Grafana, you can refer to the Official Grafana Installation Guide. We are assuming you're installing Grafana on a Debian-based system.
Once installed, you have to add grafana to systemd. You can do that by
# add to systemd to start on bootup
systemctl enable grafana-server.service
# start the service
systemctl start grafana-server
# check status
systemctl status grafana-server
Configuring Frappe for OAuth
Once you have logged into your site and completed the getting started process for the site, we will create a new entry in the OAuth Client doctype.
For accessing the OAuth Client doctype, you can use the awesomebar or press Ctrl + G to invoke the awesomebar and type in "OAuth Client", the autocomplete will show you the list of options.
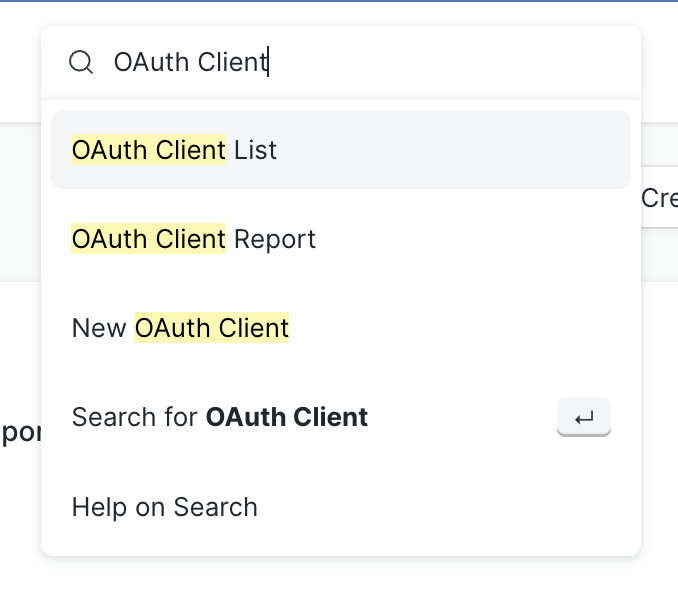
Select "New OAuth Client" from the dropdown, and you'll be taken to a page for adding the OAuth scopes and settings for the application you want to add OAuth for.
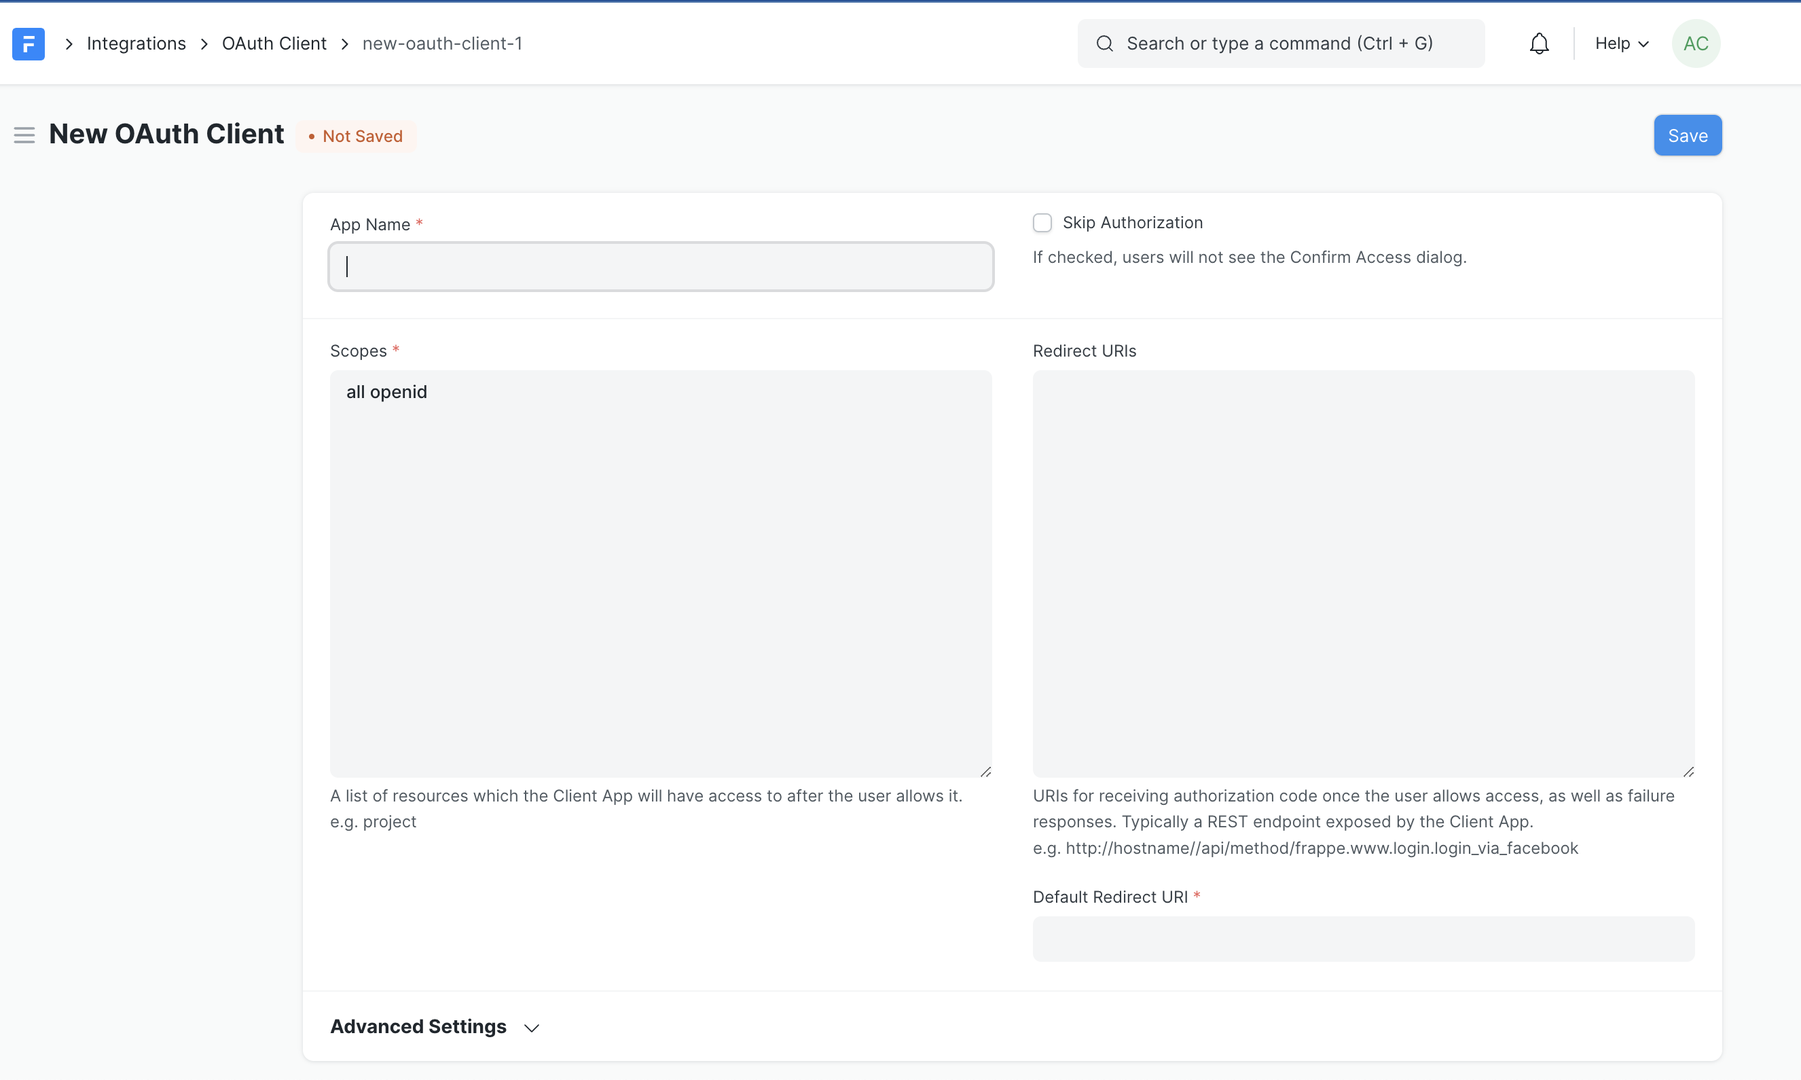
Here, you have to configure the:
- App Name (Grafana here)
- Open ID scopes
- Redirect URIs
The redirect URI for Grafana from their docs is <grafana-url>/login/generic_oauth. > If you’re on a server without a URL, you can provide the IP address of the server for the <grafana-url> part.
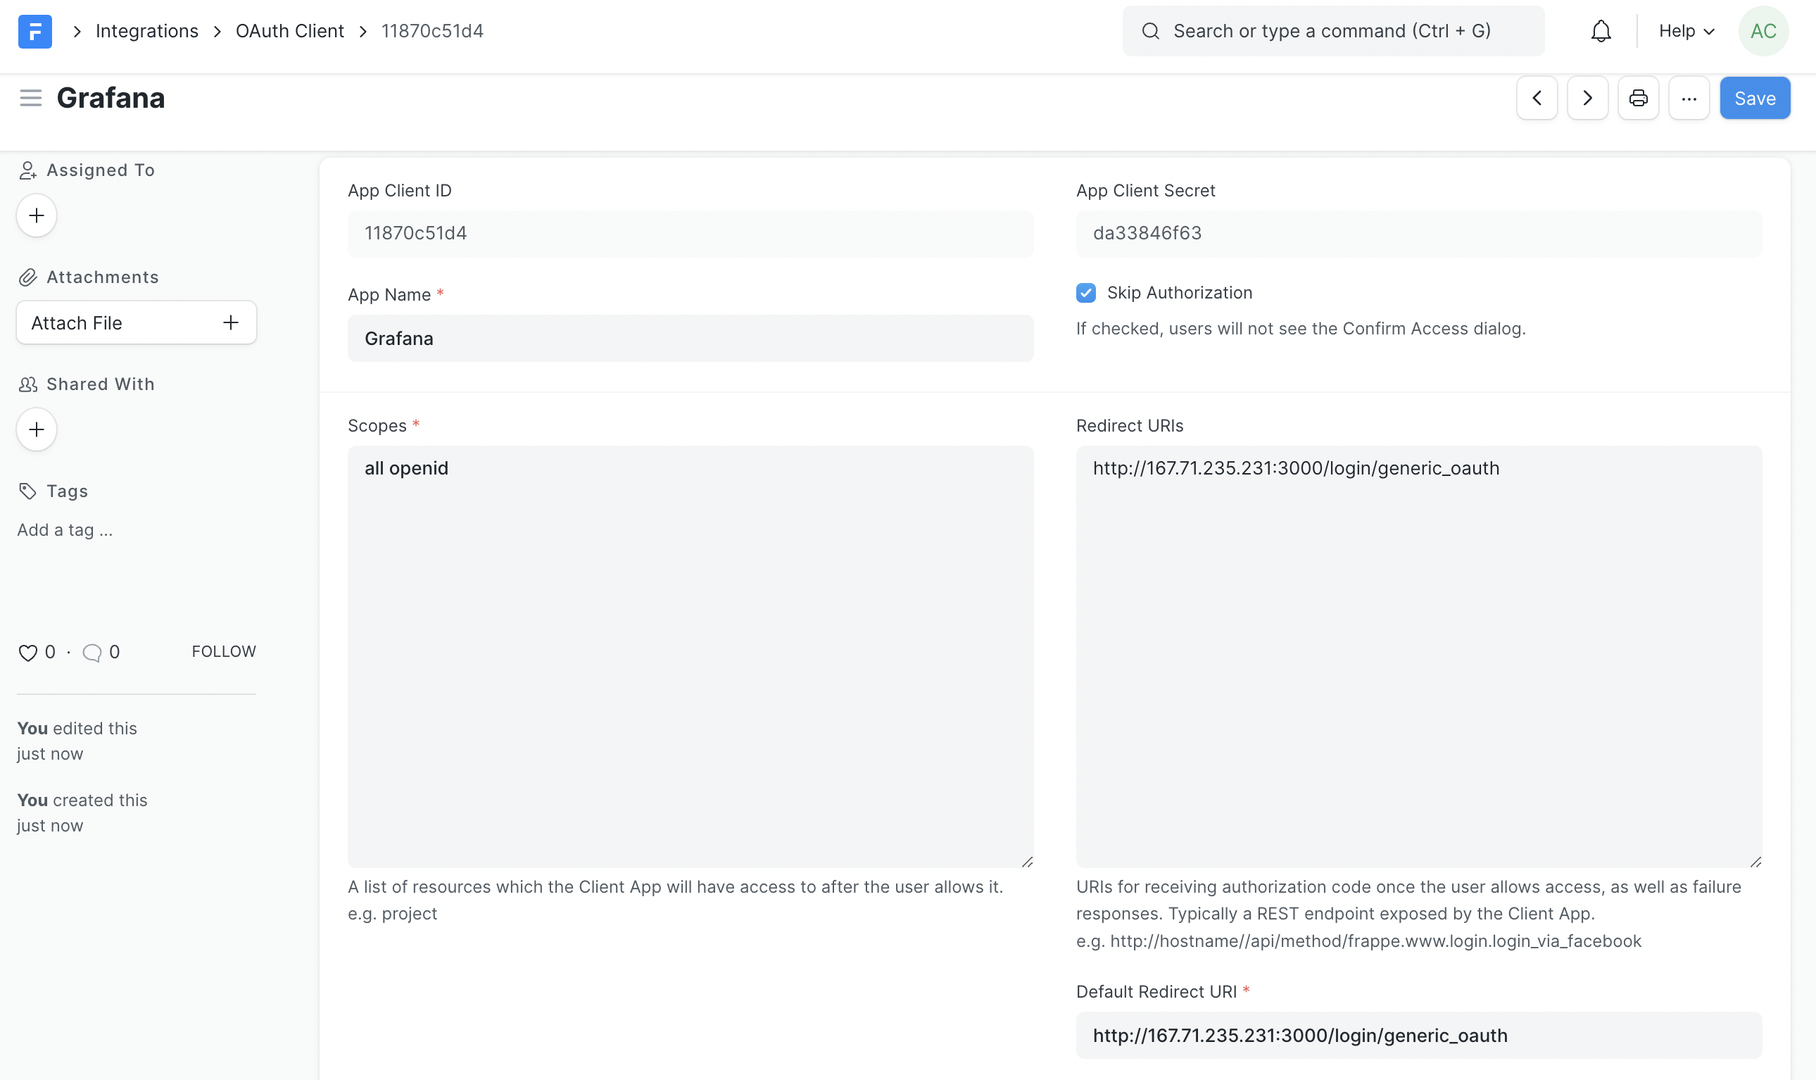
Once you have added the details in the respective fields, you will receive an App Client ID and App Client Secret. These will be used in the Grafana configuration for the OAuth setup.
Configuring Grafana for OAuth
As we have our Client ID and Client Secret from our Frappe framework site, it's time to connect to our Grafana server for the authentication.
The Grafana configuration files are in the /etc/grafana folder on an Ubuntu/Debian system. We will be editing the grafana.ini file.
$ sudo vim grafana.ini
Inside the configuration file, for setting up OAuth, you need to edit the [oauth.generic_oauth] section. Here you have to uncomment the lines and add the required data.
[auth.generic_oauth]
enabled = True
name = Frappe
client_id = ""
client_secret = ""
scopes = openid all
auth_url = <frappe_site_url>/api/method/frappe.integrations.oauth2.authorize
token_url = <frappe_site_url>/api/method/frappe.integrations.oauth2.get_token
api_url = <frappe_site_url>/api/method/frappe.integrations.oauth2.openid_profile
Also, you will have to add the domain name of the Grafana server to the config if you're using a reverse proxy. You can define the domain and root_url in the server section of the grafana.ini file.
Once you have done this and saved the file, you have to restart Grafana to make it work. You can use
$ sudo systemctl restart grafana-server.service
to restart Grafana on an Ubuntu/Debian system.
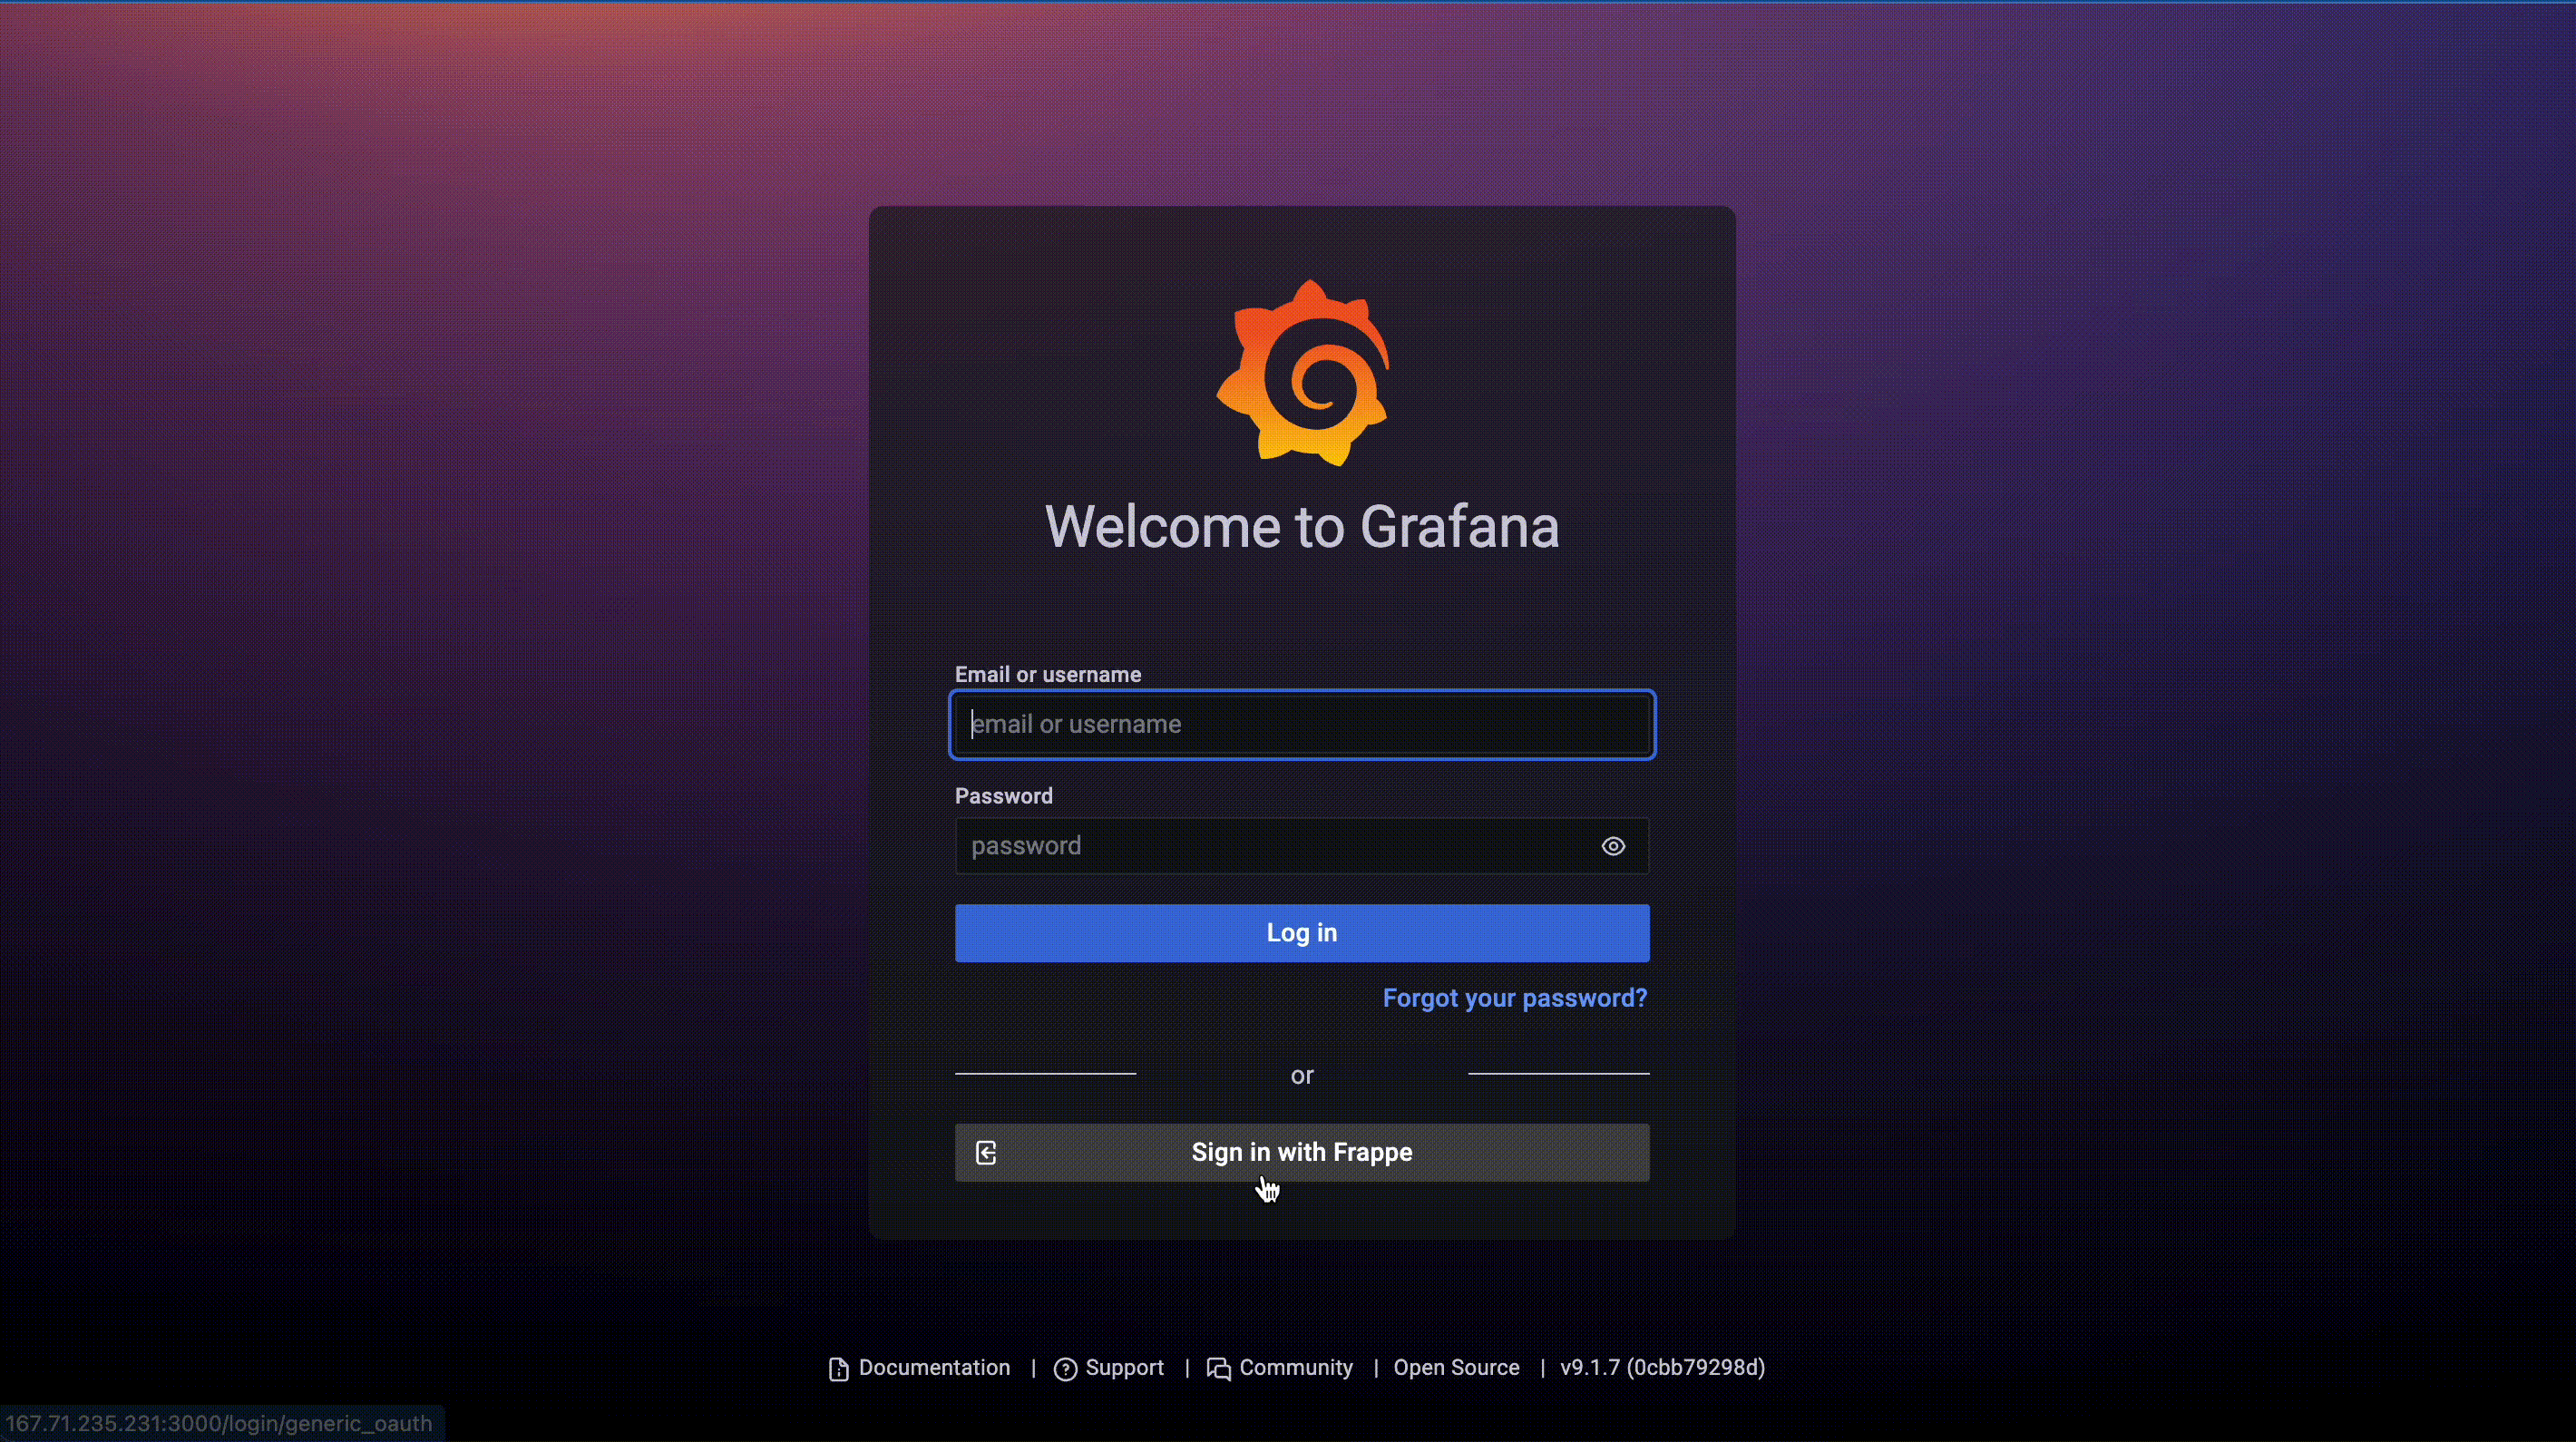
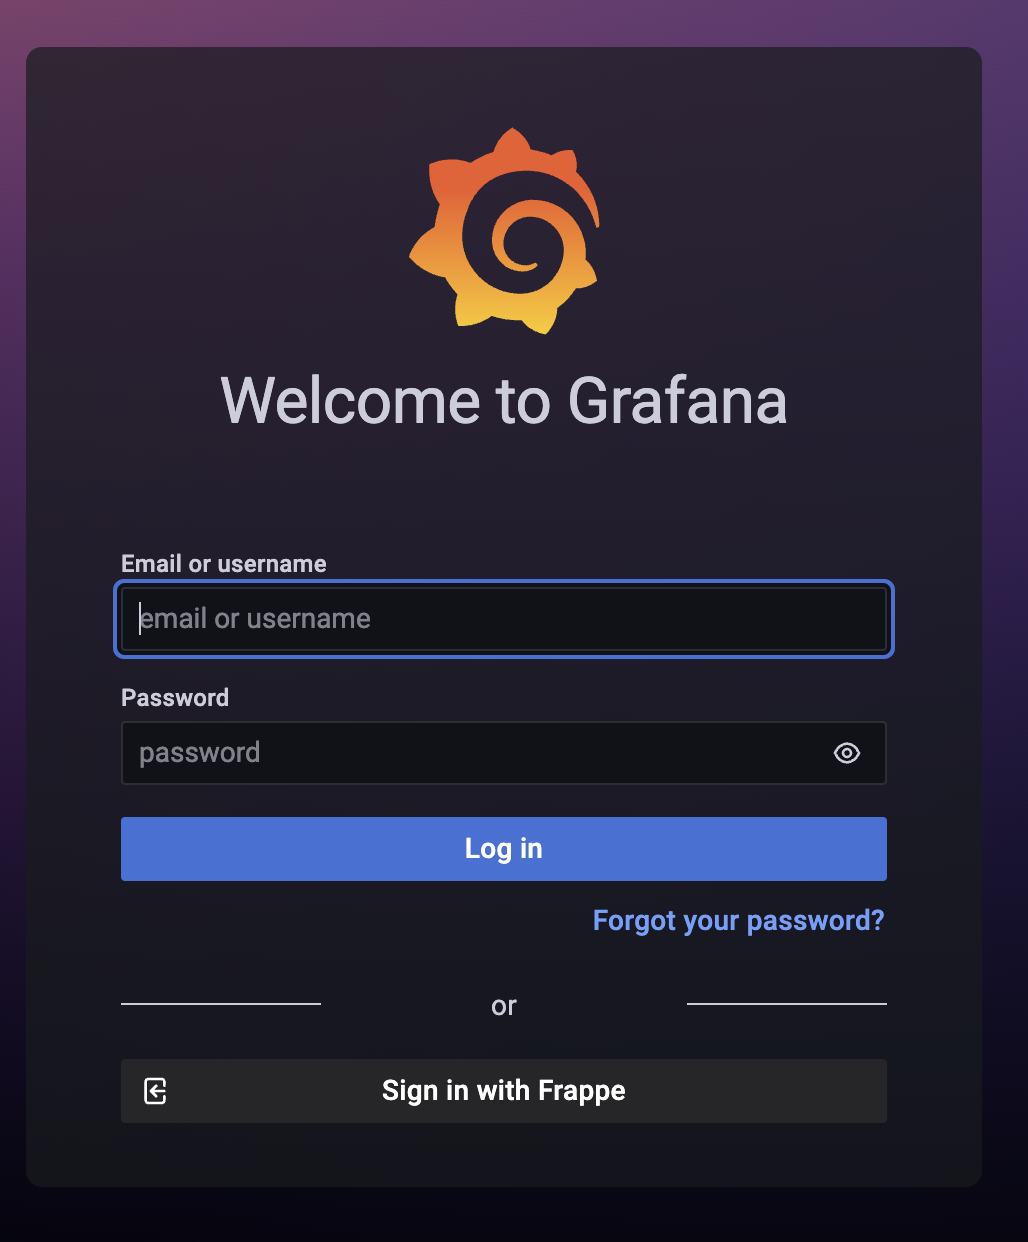
That is mostly it. Now reload your Grafana site, and you'll be able to see a "Sign in with Frappe" button on the login page.
If you have done everything correctly, you'll be logged into Grafana with the credentials from your Frappe site.