Using the Data Migration Tool
Data Migration Tool was introduced in Frappe Framework version 9.
The Data Migration Tool was built to abstract all the syncing of data between a remote source and a DocType. This is a middleware layer between your Frappe based website and a remote data source.
To understand this tool, let's make a connector to push ERPNext Items to an imaginary service called Atlas.
Data Migration Plan
A Data Migration Plan encapsulates a set of mappings.
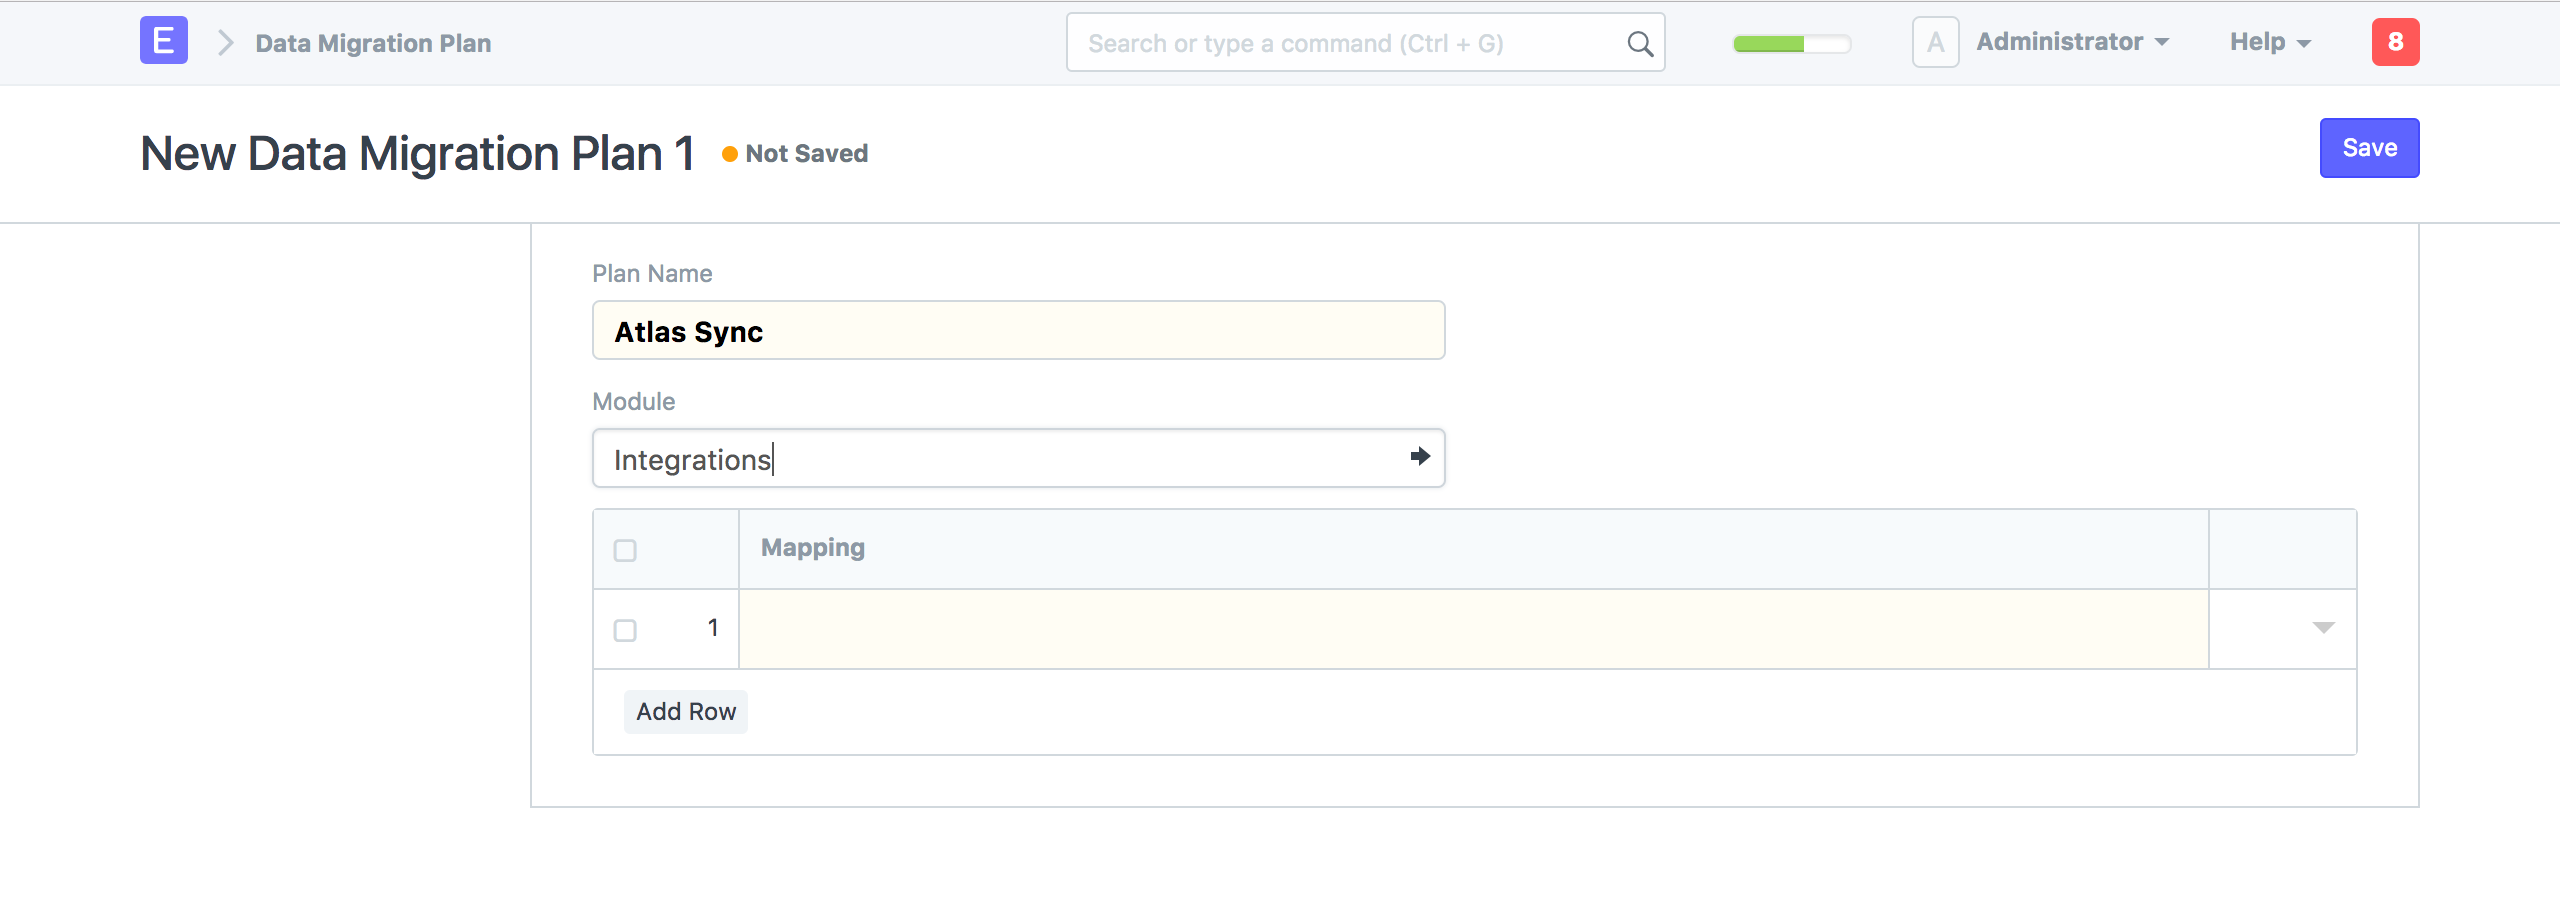
Let's make a new Data Migration Plan. Set the plan name as 'Atlas Sync'. We also need to add mappings in the mappings child table.
Data Migration Mapping
A Data Migration Mapping is a set of rules that specify field-to-field mapping.
Make a new Data Migration Mapping. Call it 'Item to Atlas Item'.
To define a mapping, we need to put in some values that define the structure of local and remote data.
- Remote Objectname: A name that identifies the remote object e.g Atlas Item
- Remote primary key: This is the name of the primary key for Atlas Item e.g id
- Local DocType: The DocType which will be used for syncing e.g Item
- Mapping Type: A Mapping can be of type 'Push' or 'Pull', depending on whether the data is to be mapped remotely or locally. It can also be 'Sync', which will perform both push and pull operations in a single cycle.
- Page Length: This defines the batch size of the sync.

Specifying field mappings:
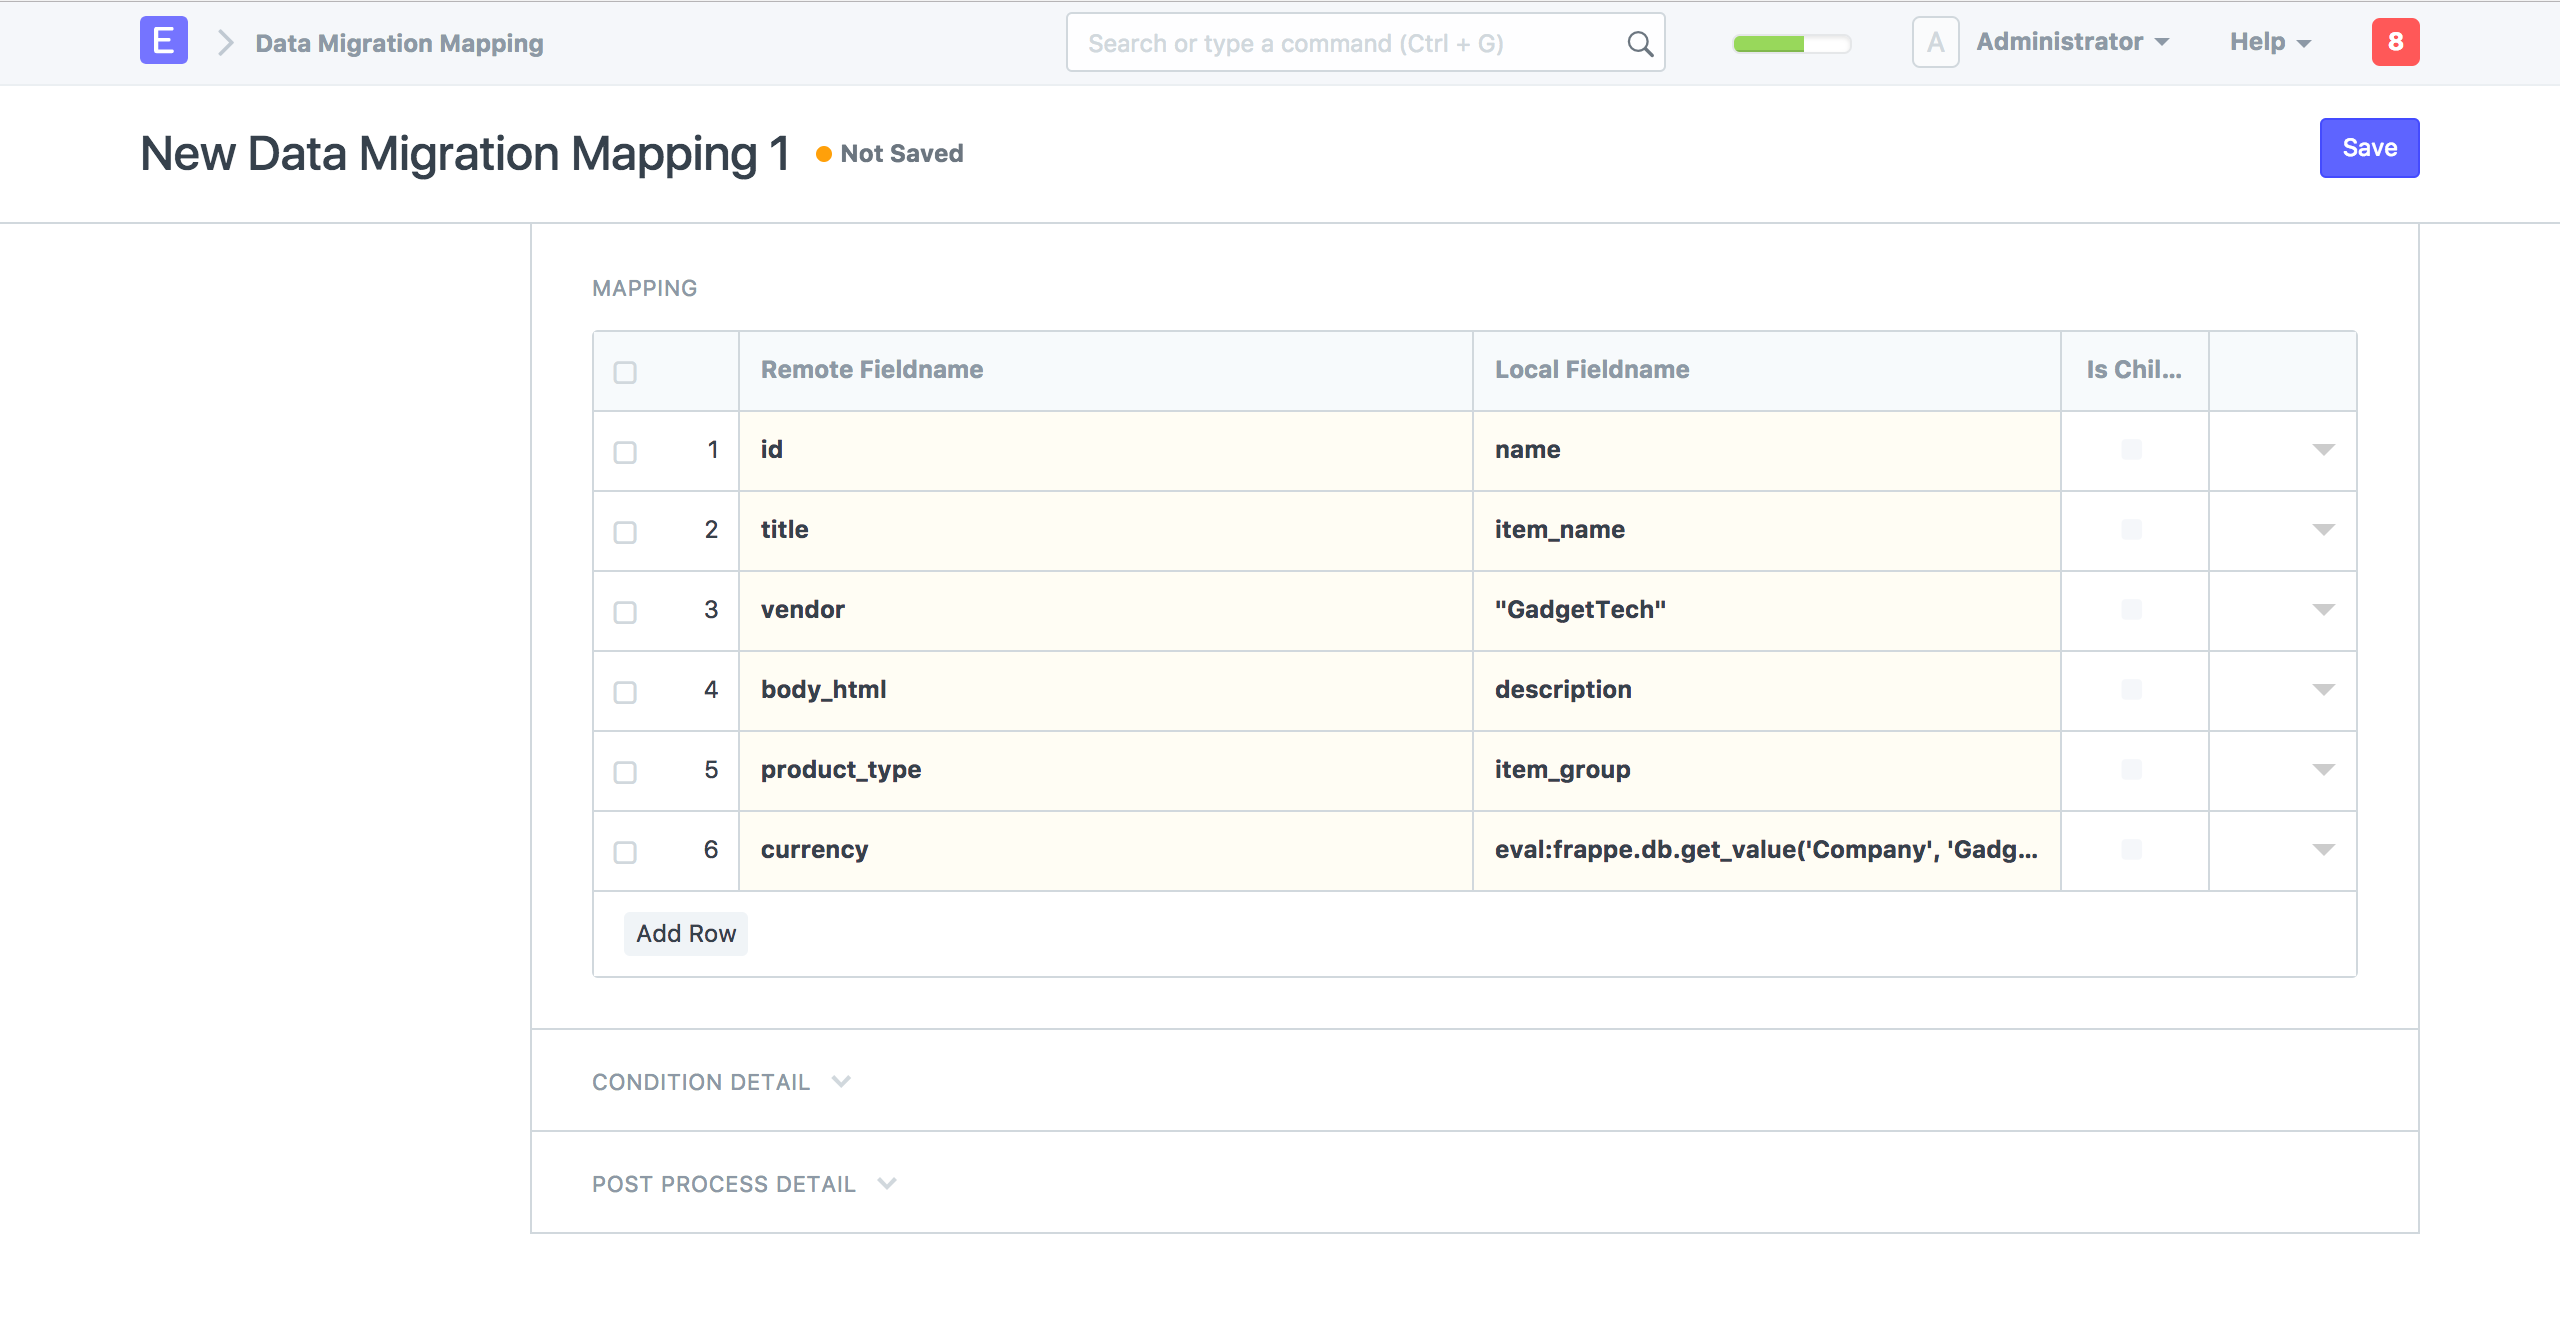
The most basic form of a field mapping would be to specify fieldnames of the remote and local object. However, if the mapping is one-way (push or pull), the source field name can also take literal values in quotes (for e.g "GadgetTech") and eval statements (for e.g "eval:frappe.db.get_value('Company', 'Gadget Tech', 'default_currency')"). For example, in the case of a push mapping, the local fieldname can be set to a string in quotes or an eval expression, instead of a field name from the local doctype. (This is not possible with a sync mapping, where both local and remote fieldnames serve as a target destination at a some point, and thus cannot be a literal value).
Let's add the field mappings and save:
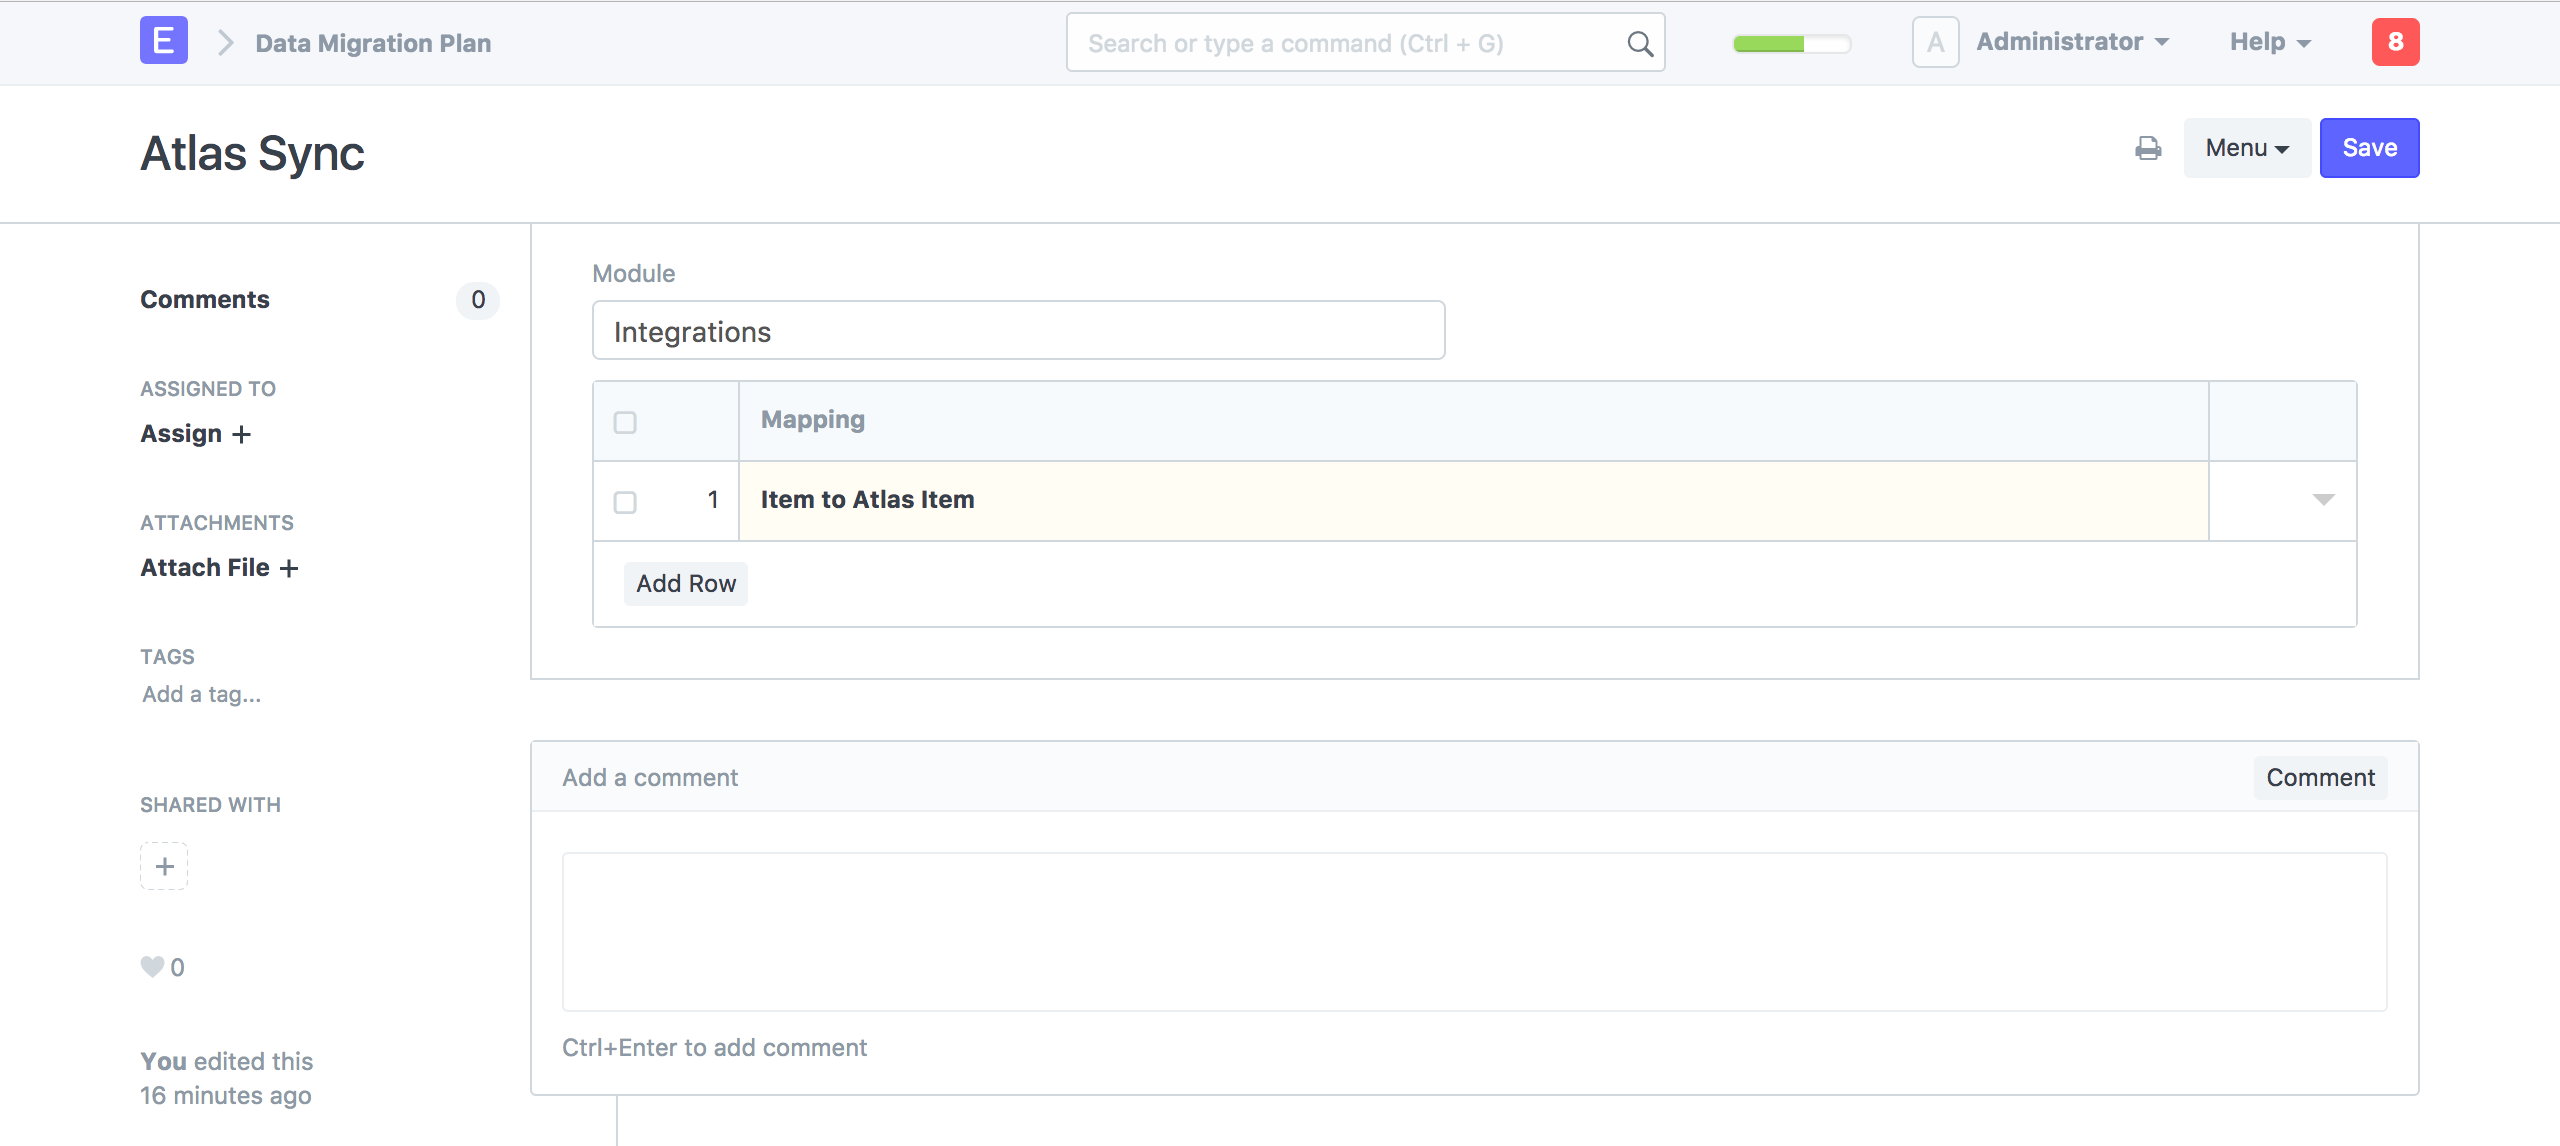
We can now add the 'Item to Atlas Item' mapping to our Data Migration Plan and save it.
Additional layer of control with pre and post process:
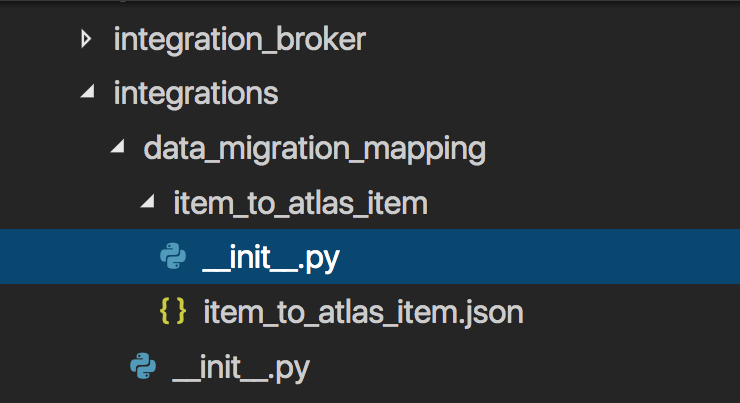
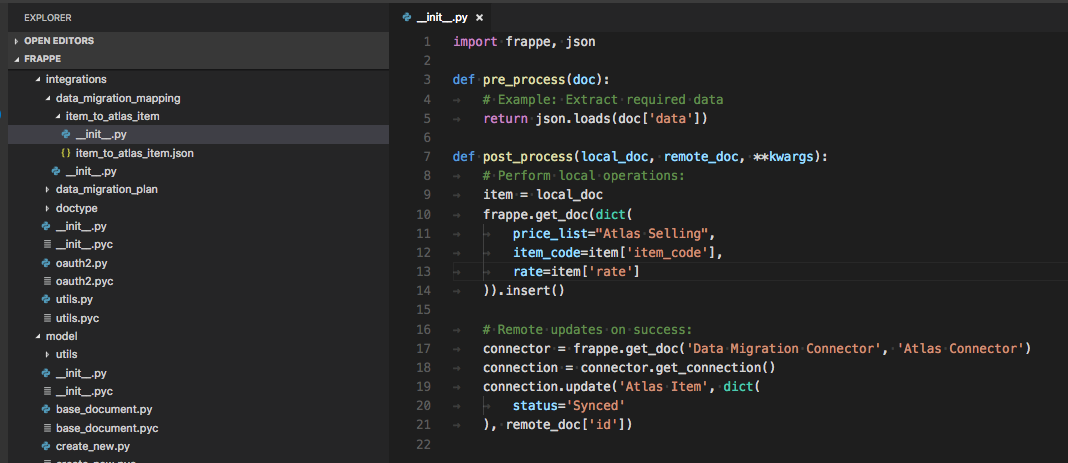
Migrating data frequently involves more steps in addition to one-to-one mapping. For a Data Migration Mapping that is added to a Plan, a mapping module is generated in the module specified in that plan.
In our case, an item_to_atlas_item module is created under the data_migration_mapping directory in Integrations (module for the 'Atlas Sync' plan).
You can implement the pre_process (receives the source doc) and post_process (receives both source and target docs, as well as any additional arguments) methods, to extend the mapping process. Here's what some operations could look like:
Data Migration Connector
Now, to connect to the remote source, we need to create a Data Migration Connector.
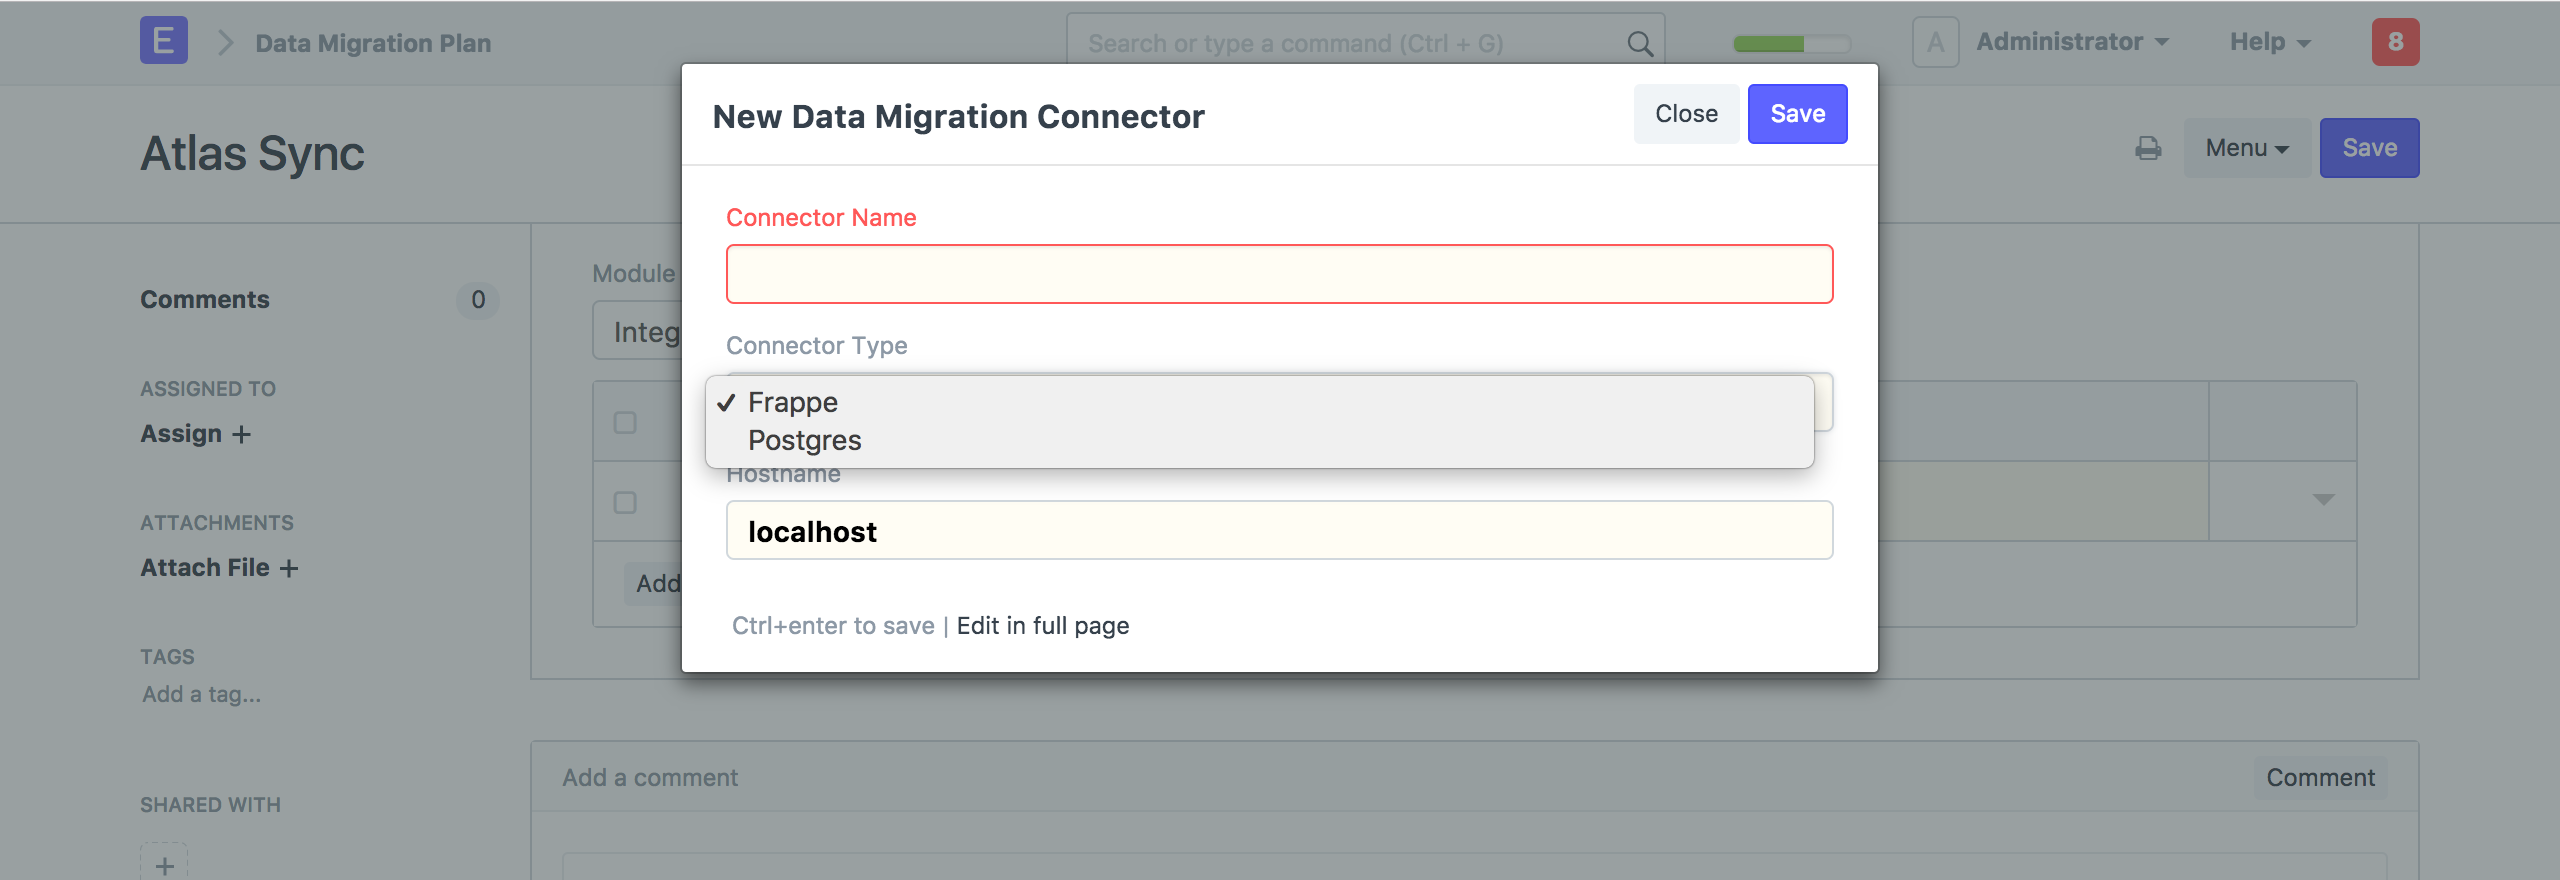
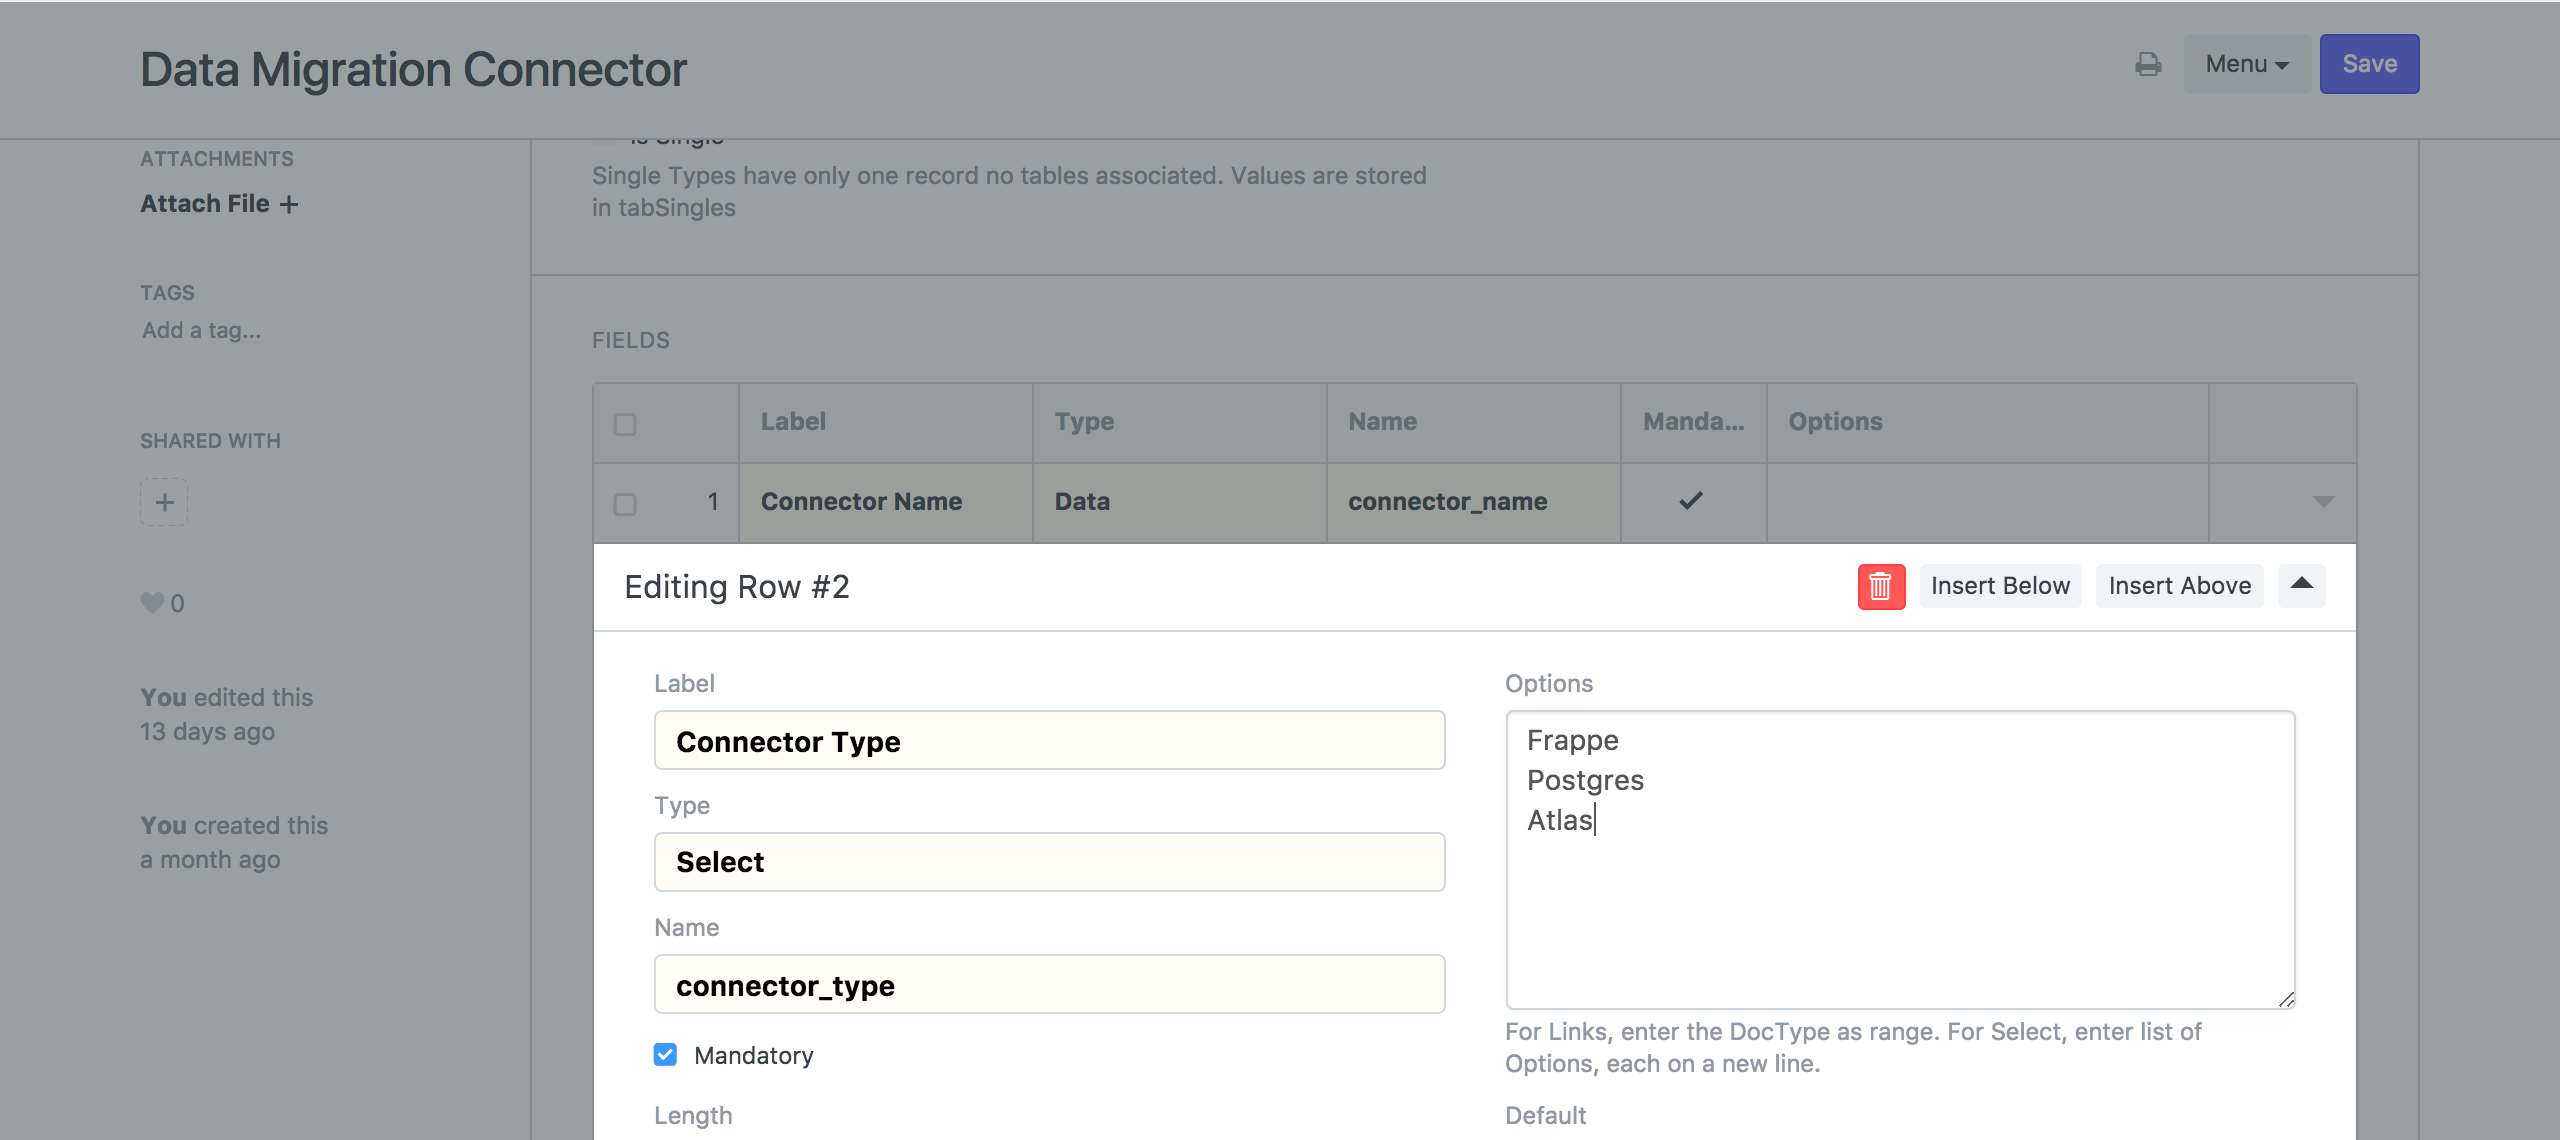
We only have two connector types right now, let's add another Connector Type in the Data Migration Connector DocType.
Now, let's create a new Data Migration Connector.
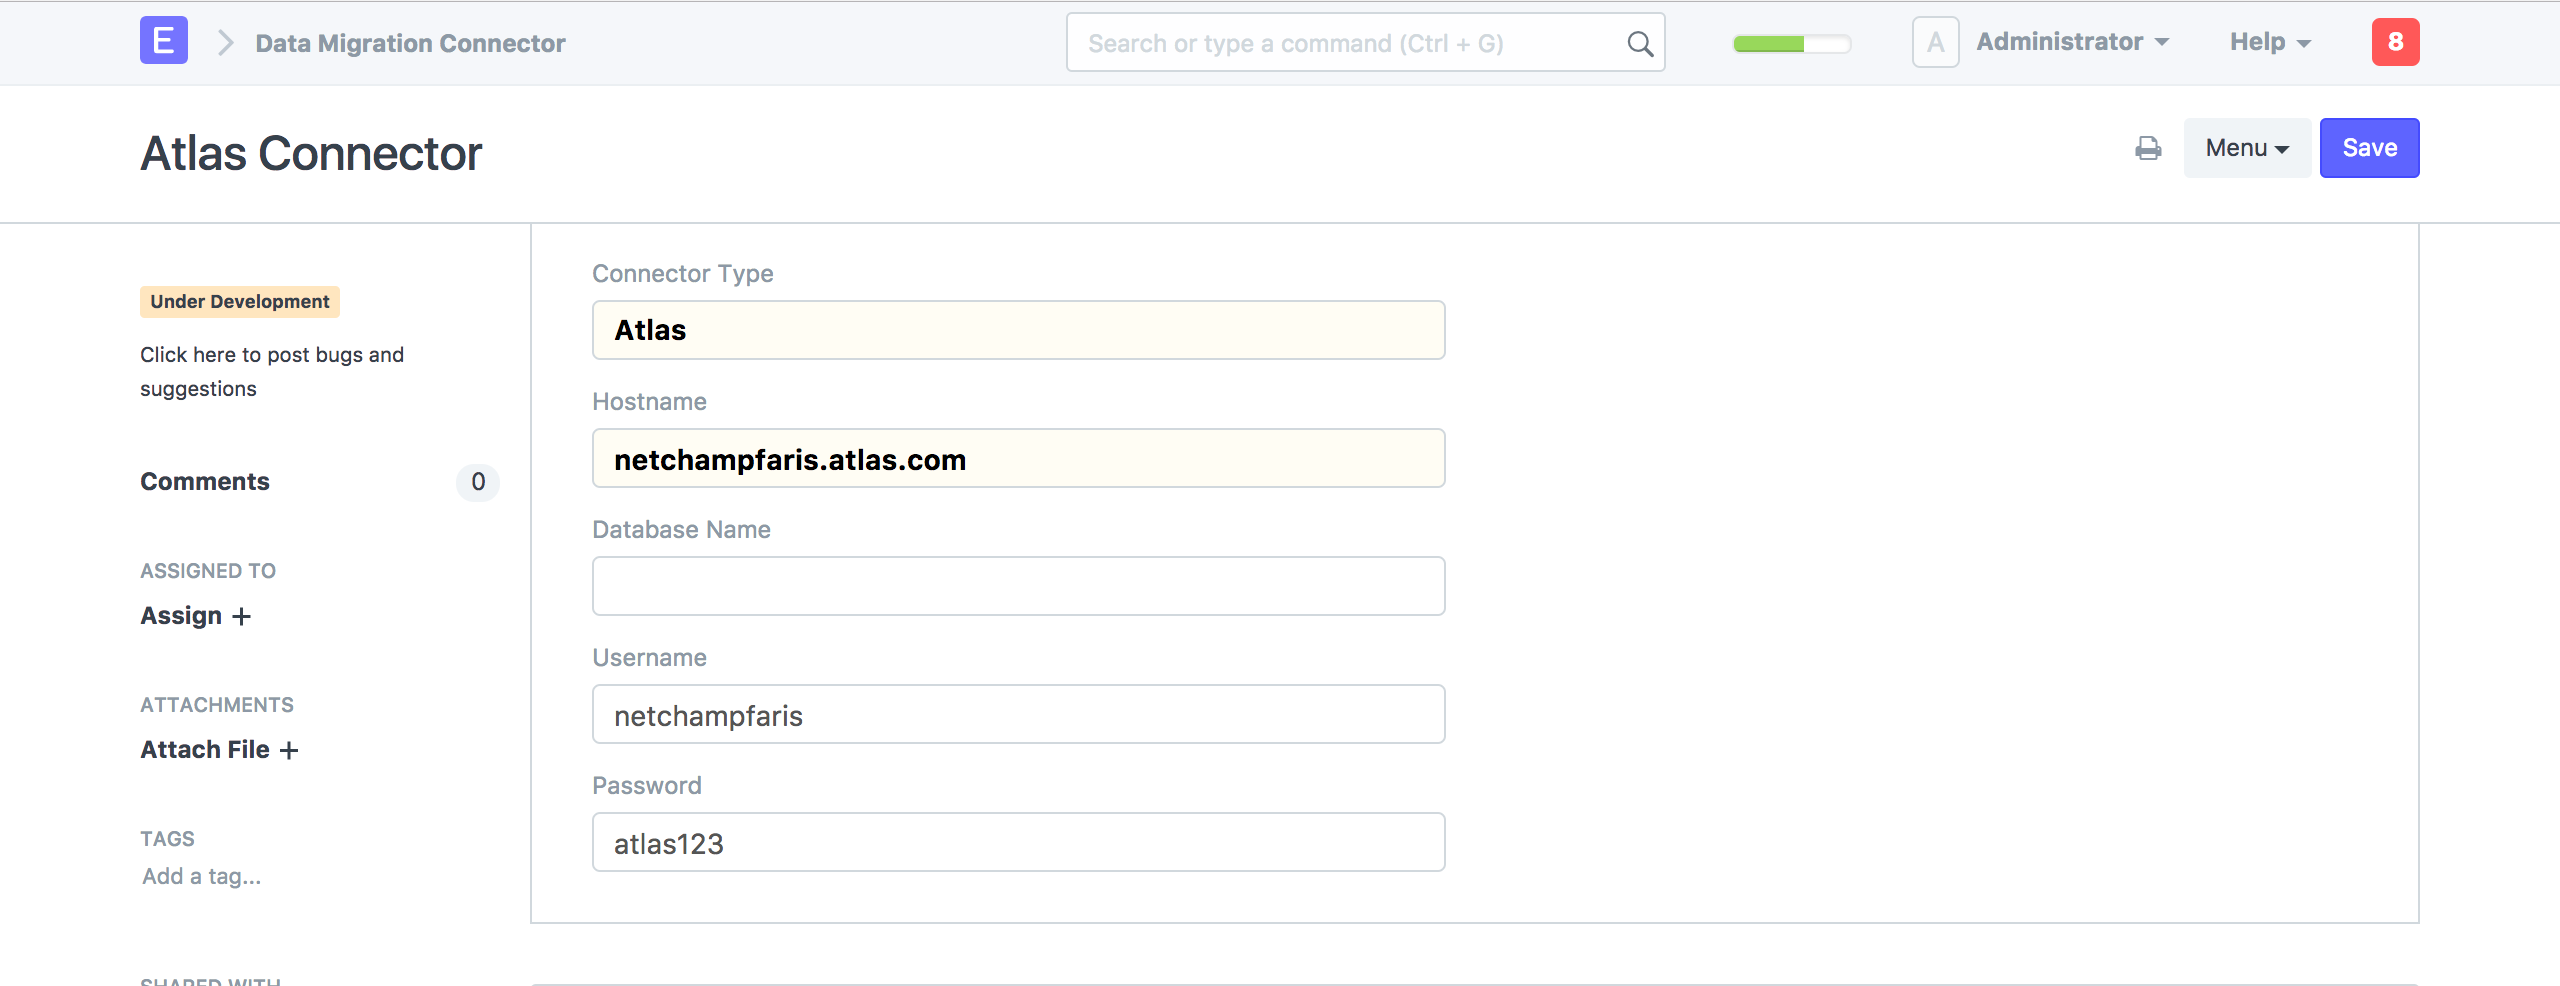
As you can see we chose the Connector Type as Atlas. We also added the hostname, username and password for our Atlas instance so that we can authenticate.
Now, we need to write the code for our connector so that we can actually push data.
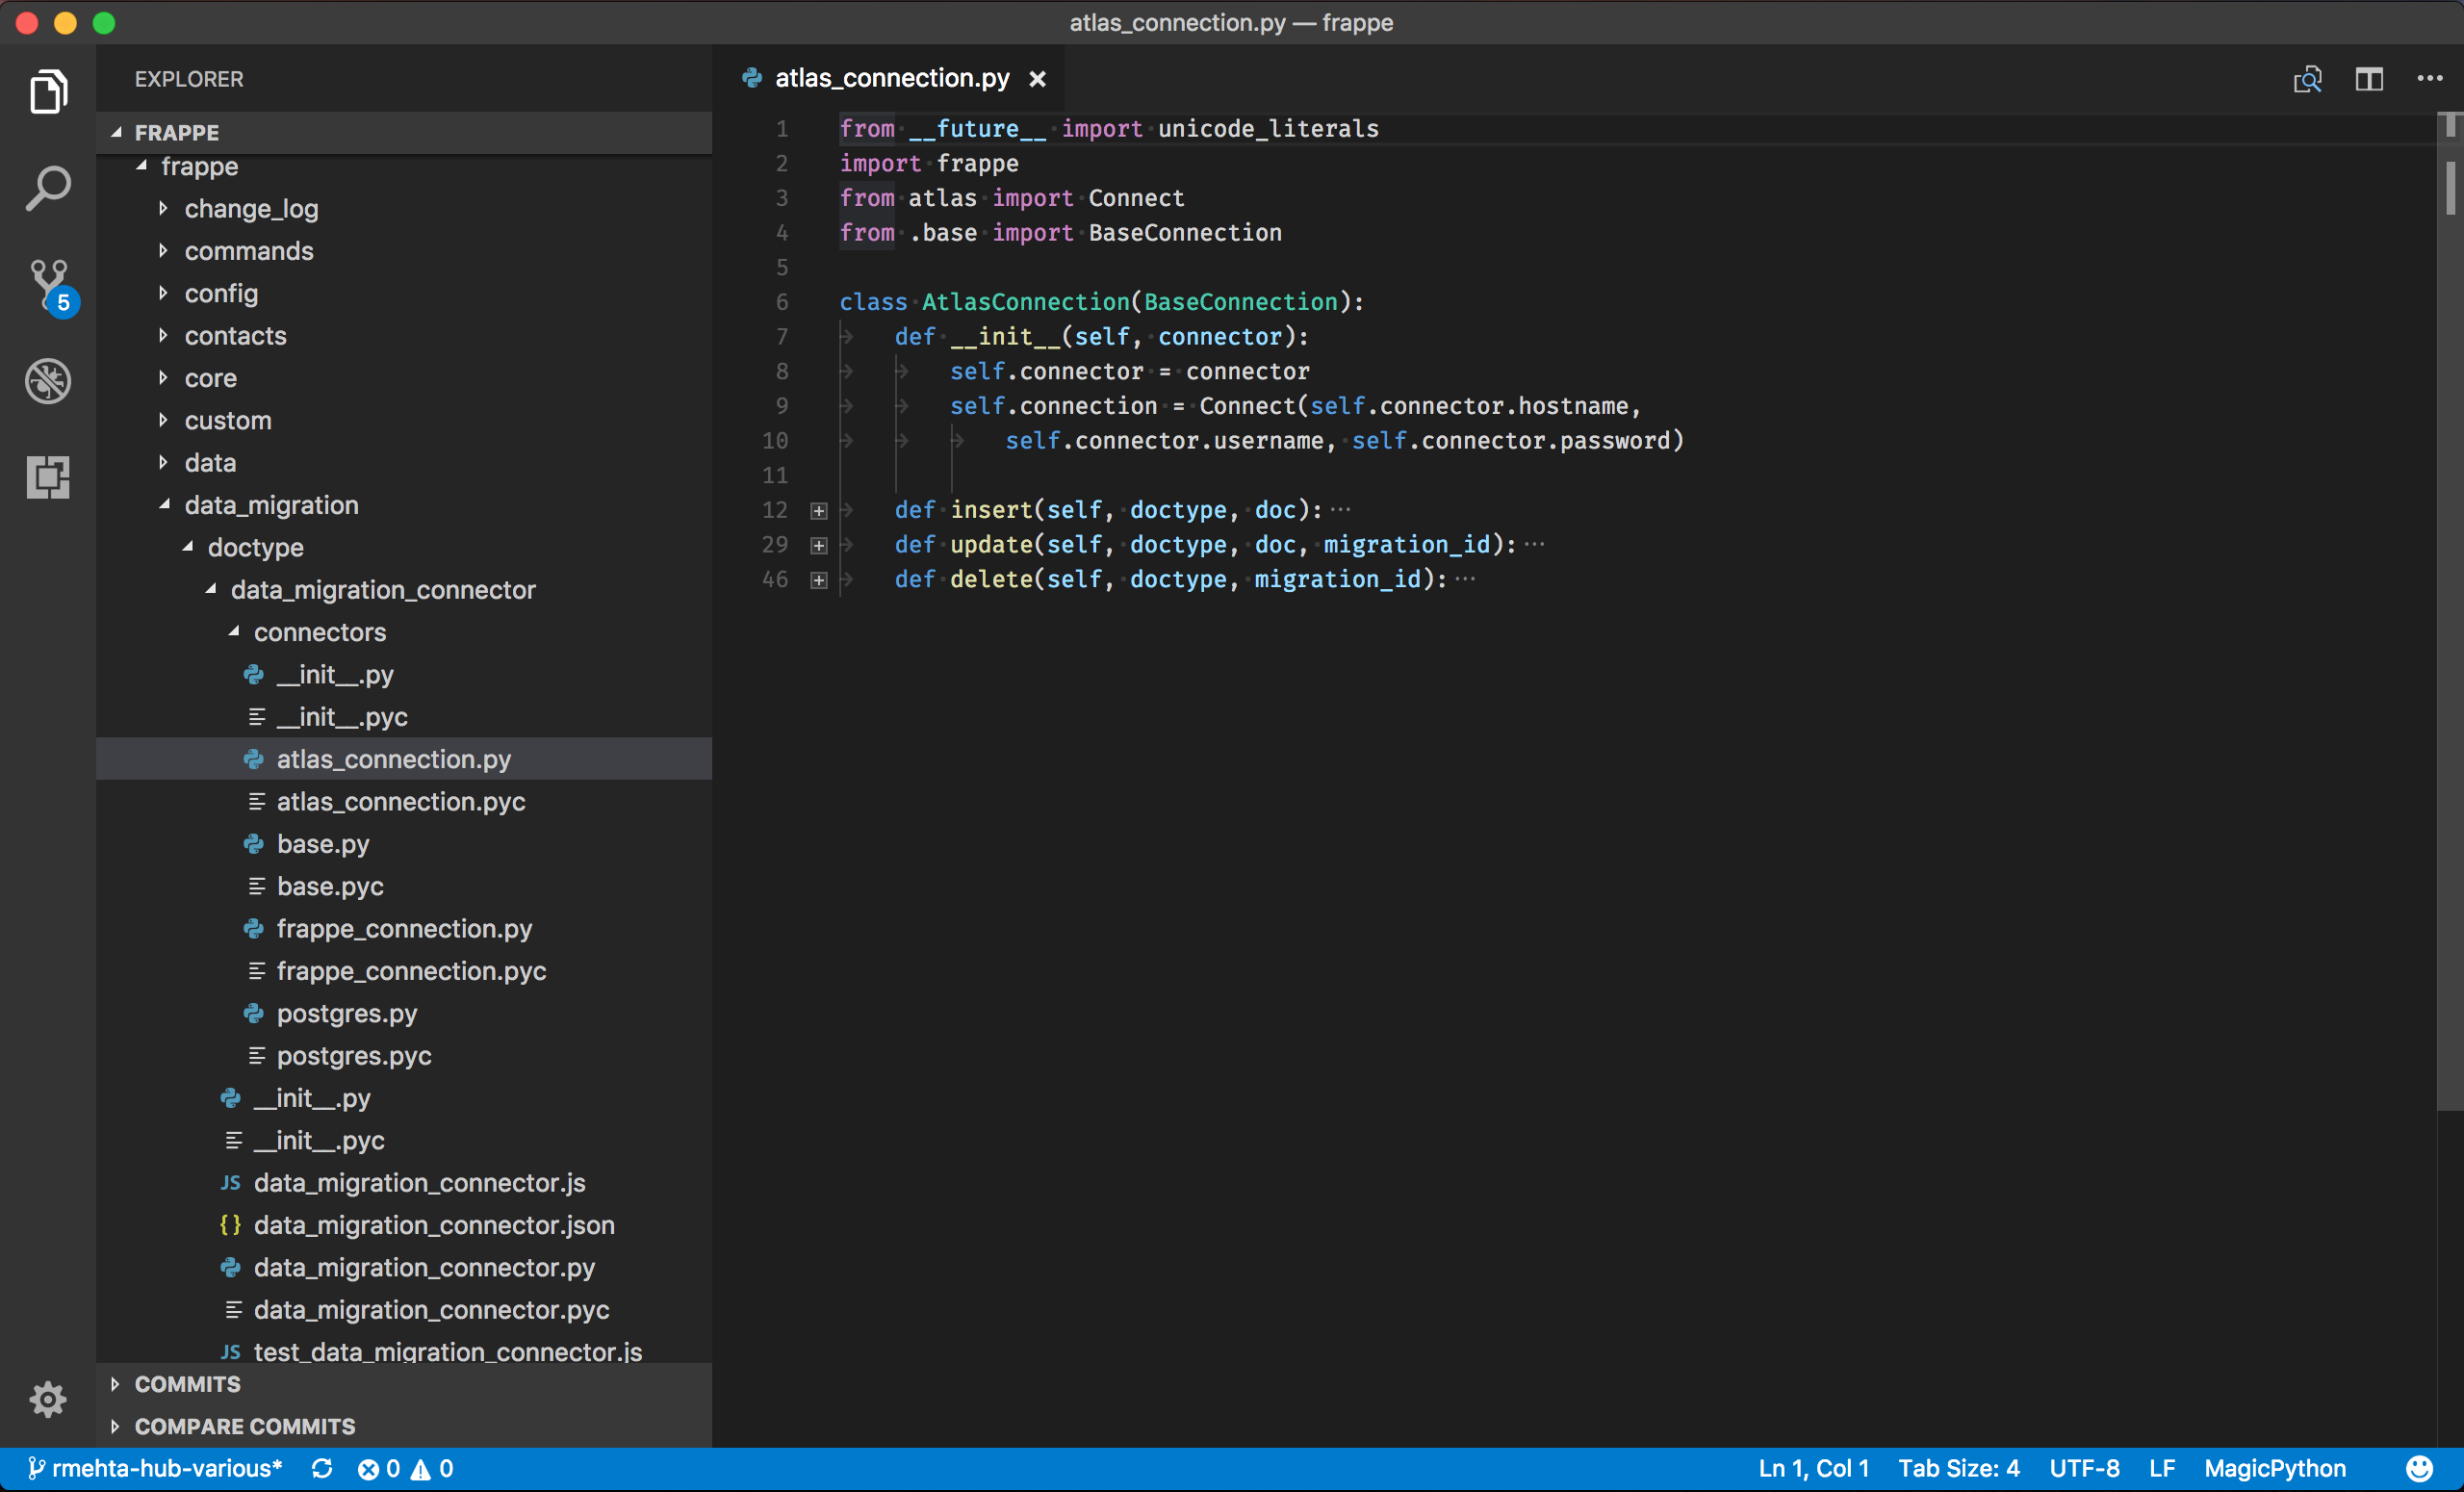
Create a new file called atlas_connection.py in frappe/data_migration/doctype/data_migration_connector/connectors/ directory. Other connectors also live here.
We just have to implement the insert, update and delete methods for our atlas connector. We also need to write the code to connect to our Atlas instance in the __init__ method. Just see frappe_connection.py for reference.
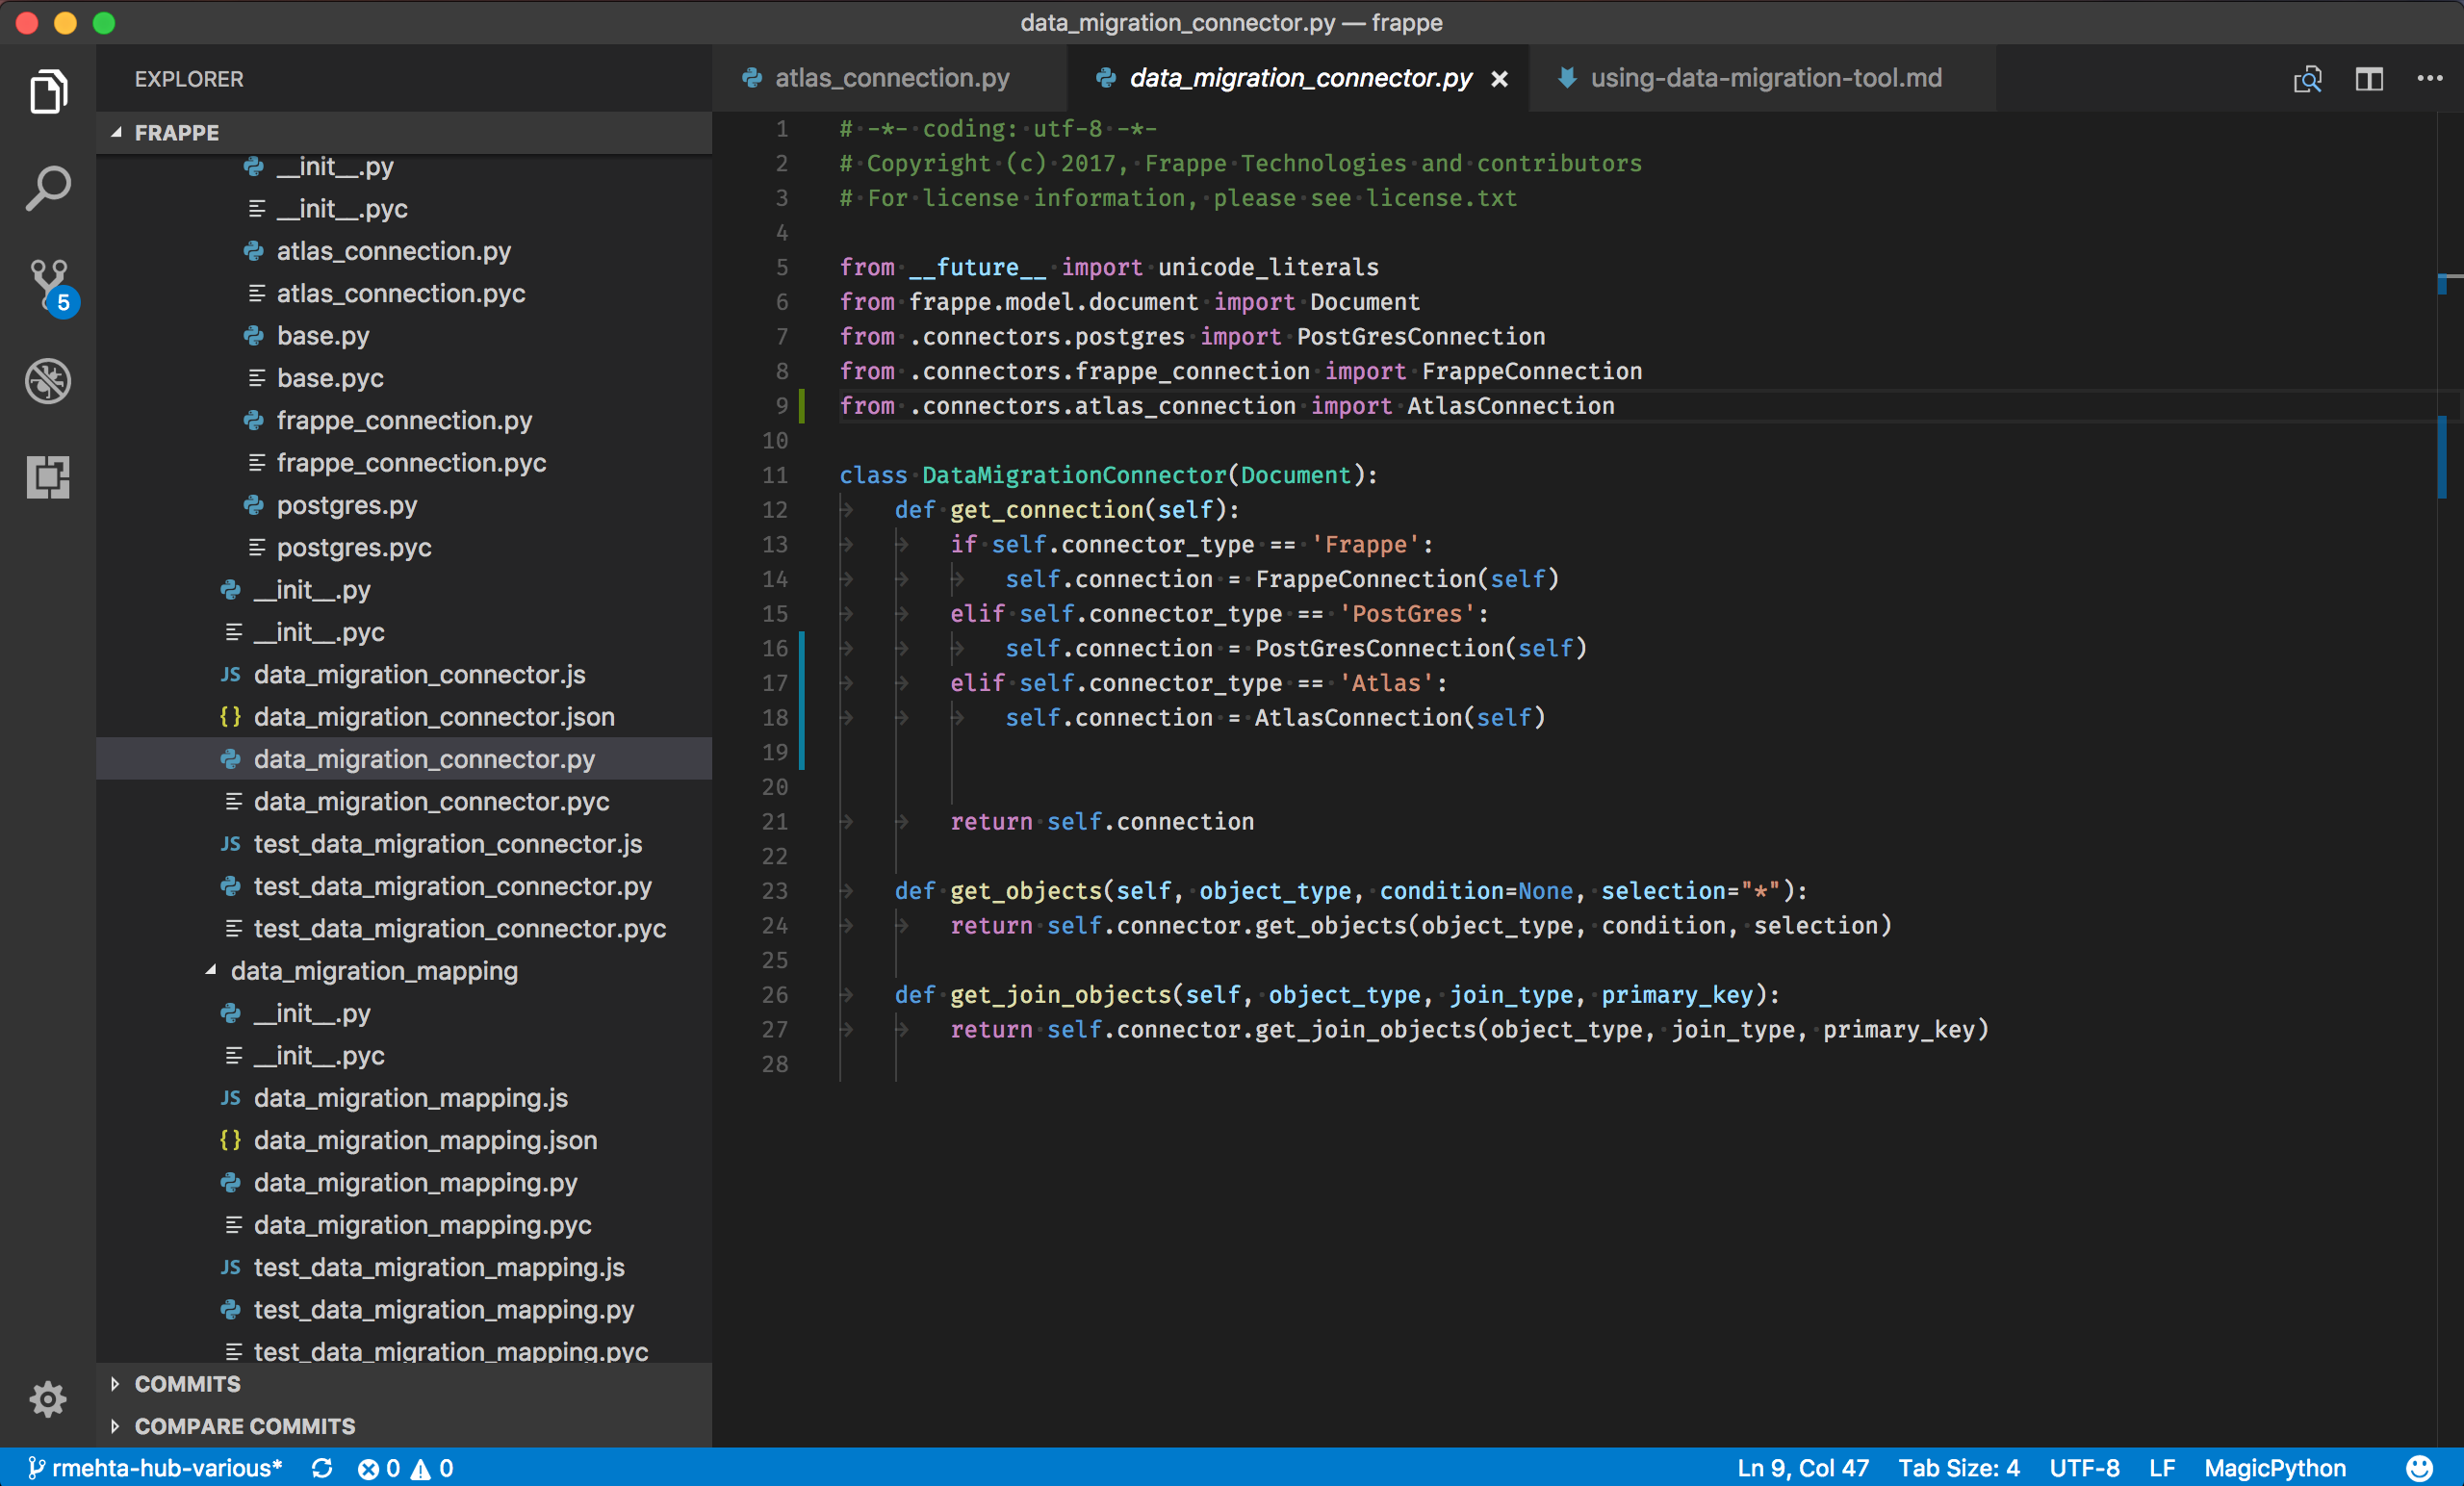
After creating the Atlas Connector, we also need to import it into data_migration_connector.py
Data Migration Run
Now that we have our connector, the last thing to do is to create a new Data Migration Run.
A Data Migration Run takes a Data Migration Plan and Data Migration Connector and execute the plan according to our configuration. It takes care of queueing, batching, delta updates and more.

Just click Run. It will now push our Items to the remote Atlas instance and you can see the progress which updates in realtime.
After a run is executed successfully, you cannot run it again. You will have to create another run and execute it.
Data Migration Run will try to be as efficient as possible, so the next time you execute it, it will only push those items which were changed or failed in the last run.
Note: Data Migration Tool is still in beta. If you find any issues please report them here